Wednesday, April 29, 2009

The dog park across the street again

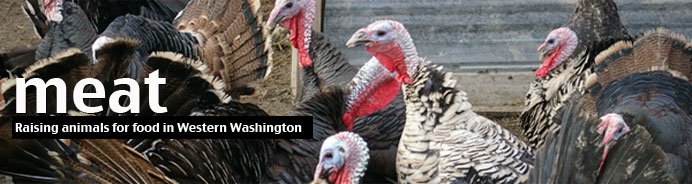
This woman let her dog out of the dog park without a leash. the dog ran across the road to my pasture fence and scared the sheep and turkeys inside that fence away from the fence. The dog then ran down my fence, through my gate and started chasing the turkeys it found about 100' down my driveway. The woman didn't attempt to pursue the dog at all. The dog was tearing feathers off the turkeys and the main reason that it didn't kill any of them was that it couldn't figure out which one it wanted to start with.

I grabbed my rifle, stood on a pile of logs and took aim at the dog attacking my livestock. I fired a shot into the ground close to it, and it froze when it heard the gunshot. If the dog had not stopped the attack the second shot would have been into its head.

I took a couple of steps closer to the dog with the intent of grabbing it and it started after the turkeys again. A second shot got it to stop again, and it took another shot for me to get close enough to the dog to grab it by the collar, about an acre or so into my property.

Rifle in one hand and dog in the other, I met the dogs owner 25' inside my gate. "I'm sorry that my dog got out of the fence". "lady, the only reason I didn't shoot your dog today was that it stopped attacking when I fired near it. It would have been easier to shoot it and let you remove the dead dog. Keep your dog on a leash until you're INSIDE the dog park, and put it on a leash before you leave the dog park. This is an agricultural area. Respect that. "

I talked to Chris Newman, who is running the dog park, and explained I'd had another dog related incident. This is the 6th one. "Bruce, I've told people to keep their dogs on lease, I'd support you if you shot one". I've asked him to put a better fence up on his side, but he thinks that the current dog park fence is enough.

I don't think that most folks who take their dogs to an offleash area consider they may lose their dog as a result. I don't like being the bad guy here, but I've done about all I can do. I've been clear, I've spent $4,000 on fencing, and I've lost livestock.

Maybe I should just start shooting them.

swine flu - egypt

The associated press is reporting that (presumably the government of) Egypt has ordered the slaughter of all pigs. Here's the quote:

"...Egypt slaughtered all its pigs and the central African nation of Gabon became the latest nation to ban pork imports, despite assurances that swine flu was not related to eating pork. "

Original stories can be found here and here.

Egypt has a christian minority that eats pork, but is a primarily muslim nation; given the religious prohibitions against pork in islam, I'm not surprised that this seems like a reasonable step.

Tuesday, April 28, 2009

Used equipment - tractor

I've found that there are two ways to buy equipment. One is to buy new, and the other is to buy used. Used seems like you'll be saving some money -- the initial cost is less, and you can often buy a better quality or larger than you would otherwise be able to afford.

So this is my used tractor. It's a circa-1993 Kubota 9580. At 100 hp it's got a lot out power, and with 4wd and a shuttle transmission, it's pretty handy around the farm. I paid $16,000 for it, and so far I've spent around $1,000 maintaining it. That's the drawback to used equipment -- you have to fix it.

The other issue with used equipment is that you often don't know the maintenance that was done. So I look at what I'm going to buy carefully, but you're really limited in what you can know. So my routine for buying equipment is to do all of the maintenance that might reasonably be due.

Oil & filter change, hydraulic fluid & filter change, fuel filter change, greasing all fittings (that was a fun 4 hours, let me tell you!), checking the toe-in of the front tires, and so on. With this tractor I also had to mount the drivers side door and rear glass window on the cab; I got the glass as part of the deal, but had to buy the various hinges and so on from kubota (for !!!$500!!! -- are they gold plated? yeesh!) and mount the glass.

This is the reason for todays maintenance break; a 12" gash in the front tire. So the tire itself is $620, and you have to wait a week or so for it to get here. So while the tractor is idle, might as well do a maintenance day on it. Fix the light on the dash that burned out. Check and diagnose why the air conditioner doesn't work (you have to remove half the tractor to replace the fan belt that is missing for the air conditioner-- joy!) and get the various lights working. While you're at it, might as well blow the radiator clean, change the air filter, replace the other belts in the engine compartment that look fine, but hey, you're there anyways, right? and finally replace the hour meter so that you can be more precise in your future maintenance. The hour meter costs $320, by the way.
My experience has been like this for most of the used equipment that I've bought. You either pay the price for a new, or you end up paying a very similar amount in maintenance. The advantage with new is that you know when the payment is due. With a used tractor it pretty much decides when a payment is due.
So this months tractor payment:
Front tire: $620 + $22 mounting fee
New hour meter: $320
Bulbs and lenses for lights: $15
New fan belts: $55
New antifreeze, oil, hydraulic: $120
Air conditioner charging: $65
Plus 2 days of labor to take it all apart, and put it all back together.


Just a note: Swine flu? c'mon!

Got to love the current illnesses name if you raise pigs.

Monday, April 27, 2009

Ever wondered how greenhouse plastic gets tattered?

They bob and weave, back and forth, gobbling and shooting arrows at each other with their eyes.
The tom inside the greenhouse is a bourbon red, the one outside is a blue slate. They're in full regalia here -- see the snood of the blue slate Tom? It's erectile tissue, and they extend it to make them seem even fiercer and more turkey-like. It's funny because they all do it, and it just changes their look, and you'd think that the other turkeys would figure it out, but that's a Toms life.


Turkeys are pretty silly.


Sunday, April 26, 2009

piglets sleeping in the sun

I was walking by the farrowing barn and saw the piglets sleeping in a pigpile. If I'm quiet I can sneak up on them.

I've been sufficiently quiet, they're still sleeping soundly. Notice that they're all woven into each other, head to tale. that's the way piglets sleep. They snore a little.

I'll sneak a little closer here.
Yep, they're out of it. but it's not like they're alone. Mom is sacked out too. that's her in the picture below, to the left. It's exhausting raising this many piglets. Moms need a break, too.
Everyone sleeping in the sun on a warm spring day.

Saturday, April 25, 2009

Pig slaughter class followup

We held the pig slaughter class I mentioned here and here. Thanks to everyone who attended the pig slaughter class ; I got a lot of feedback and had a good time today.

The pig was shot in its sleep, sleeping in its favorite spot. The way I want to go. This particular pig is a 290 or so pound barrow. Nice and fat.

Over to the scraping station, and the scraping begins

This is a hands-on class. Pour on boiling water and rub the skin & hair off.

Everyone participated. We demonstrated both scraping and burning the hair off. The dark areas are char that is incompletely scraped off -- which doesn't bother me too much as I'll be smoking it and it'll turn dark anyways.

Splitting the pig, stem to stern

Something is in this plastic bag. To a 12 year old, it's pretty interesting

Carcass is split -- you could barbecue this pig just like this if you'd like. Meat saw makes quick work of this.

The front leg is already off that half, here's the ham coming off. The lion and belly are still attached.
The loin has been cut off, here's the belly. I'm explaining about making bacon here.

Now for the 2nd half. Lots of discussion about options in cutting.

As each primal comes off, we bag it for later icing.
Thanks again for a great day!

Pinky takes the piglets for a stroll

Here's pinky with her whole brood. She's been in a pen for the past month or so, and is glad to get out. Her piglets are big enough to fend for themselves with the herd, so we're turning them loose for a few hours each day. Pinky is still nursing the piglets, but is spending more and more time away from them. This encourages the piglets to eat solid food and drink water.

Commercial pig operations will often separate pigs from sows at 2 to 3 weeks. I prefer to let the pigs grow to full size by keeping them on the sow for 7 to 8 weeks. The piglets are running around squealing with joy and curious about everything.

Here the piglets are running at me in a group. So fast, in fact, that I can't take the picture fast enough to catch them all. They're fascinated by my muddy boots.

Friday, April 24, 2009

The lambs are all dead.

Sorry for the dramatic headline, but it's accurate. I've talked a few times about starting slow and experimenting with crops, and that sometimes things don't work out. So this time is one of those.

We had 4 lambs. One of the ewes had a single lamb, the other had triplets. I'm inexperienced with lambs and sheep in general, so I was watching to see when the lambed, but really don't know what to expect, or what is normal.

With pigs, it's pretty normal to lose a pig or two out of a litter -- they're stillborn or die a few hours after being born. So when I found a dead lamb in the pasture the day they were born I chalked it up to that. But I didn't find the lamb until after a pig had found it (I assumed) and all that I found was the head and spine. The rest was gone. But the other three lambs were fine.

I excluded the pigs from that pasture on general principles -- I don't know if a pig will eat a live lamb, but I don't want to find out, either. So having done that, all looked good and I watched for the next day or two. I was a bit concerned about the interactions between the lambs and the cows, afraid the lambs might get stepped on, but it looked ok.

But today all of the lambs were dead. Click on pictures for bigger versions if you want to see more detail.

Small wound on ear; not a serious attempt to eat it, just a bite wound. No tissue missing, just some blood.
The throat is how this lamb died. you can see the teeth marks in a line starting a little above my thumbnail and extending across the throat. There wasn't much blood there. I think that they
died from suffocation, having their throat clamped shut. Picture is the bottom of the throat looking up towards the ears
On the opposite side of the head there's a definite tooth mark in the jaw below the eye. Same marks on the other lambs.
I don't think this was a weasel or a fox. The teeth are too big. That fang mark is as big as my fingernail. I don't think it was a coyote because none of the sheep were eaten, and none were carried away. Coyotes might kill a bunch of sheep, but they'll usually carry it away, especially if they're feeding kits.
So what do I think it was? A domestic dog. Which bums me out. I've had three incidents this week with dogs from the dog park chasing and pulling feathers out of turkeys. I think that it's likely that someone thought it was cute to watch their dog "herd" the sheep and it went wrong quick, or maybe someone didn't see their dog go do this.
This is the sort of thing that makes shooting dogs a reasonable option. A few seconds and the lambs are dead.
No lambs for me this year. what a bummer.

Thursday, April 23, 2009

Hoophouse construction part 3 (of 5)

Drove all the posts for the other half of the hoophouse today, assembled all of the bows. Probably put plastic on the bows tomorrow. For scale, notice the guy standing next to the red ladder in the center distance.


Here's an example of the wrapping done on every joint to ensure that the plastic only touches smooth surfaces. I want this plastic to last for the full rated 4 years.


The finished rail design, from the inside of the hoophouse. The top and bottom rails are for attaching tables or chicken wire to, as previously mentioned. Even the heads of the bolts get wrapped with duct tape.

Wednesday, April 22, 2009

harley rake on plowed ground

This is a comparison of a harley rake vs a comparably sized rototiller. The ground is sod on a clay base, a little wet. You can see water in the furrows to the left of the tractor. On the right side you'll see what the tiller puts out after a single pass. This pass I'll make with the harley rake to provide a comparison.


Click on the pictures for a bigger version, and use the bushes in the background to orient yourself. So the row immediately to the left of the tractor is a pass with the harley rake, and further left is the tiller. The harley rake didn't do a very good job. The big clumps of sod and clay got caught up in it, and it ended up dragging a lot of material; enough material that it stopped forward progress of the tractor, so I had to lift the implement and back up. The tiller just chewed up the sod and laid down a bed that was ready to go in a single pass.

Ok. So lets see how the harley rake does filling in a furrow. The water filled furrow in the center of the picture is about 18" deep. Here goes.

Ok -- it did fill in the furrow a little bit, but the finish is uneven, and as last time, I had to stop, fiddle with the implement, and go forward a bit. To get a finished seed bed I'd be happy with would take another complete pass.

Summary: Harley rake is not the implement I'd choose to level plowed ground. I'd rather use a disc or a tiller. In this particular job I had to use a tiller because of the close quarters work. If I had a wide open field, a disc would do as good a job and be much faster than tilling. The harley would take 2 passes to get a consistent surface that the tiller achieved in 1 pass.


Tuesday, April 21, 2009

Tilling the land

The neighbor has decided to lease portions of his land for people to garden on, and I've been tilling the land to prep it for a garden. It's been interesting. The soil itself is a clay base, with the top 4" or so pretty good organic material. Mostly sod.
But it's never been tilled, and under the 4" it's pretty darned hard. Hard enough that it was tearing my little tiller apart trying to cut it up.

So after a hundred yards or so of no success with the tiller, I got my 3-bottom plow and plowed the land up. Two reasons for this: First, it'll break up the dirt into something the tiller can easily digest, and second, the plow will hunt for stuff that I don't want the tiller to hit. Like big timbers, car leaf springs, axles, and so on. The plow is designed to rotate when it hits something hard, so it's pretty safe to cruise around with it and let it find the big items. When it does hit something you get out, reset the blade(s) that are tripped, and then off on your merry way.

The picture above shows what it looks like after I plowed, and on the right and top you can see what it looks like after a pass with the tiller. The tiller is just a big tractor-mounted rototiller.
So after plowing there's big hunks of sod, after tilling there's a pretty fine, chopped up soil. The water shows between the sod because the clay underneath is effectively waterproof. Near as I can tell the water drains horizontally off this field. If I were going to farm it next year, I'd probably use a subsoiler to plow 3-4' deep to provide better drainage.
Here's the view from my tractor cab while I'm tilling. You can see the furrows from plowing ahead and to the left, the finished seed bed to the Right. This sure is pretty soil.
Some of the people wanted to till it themselves, some wanted it tilled. I think that the smarter ones are the ones who wanted it tilled and lime added. The soil is pretty acidic, and lime moderates that acidity. I'll be interested in seeing if the folks who didn't want their plots tilled, like the folks on the right here, with the water troughs, actually do dig their plots up by hand. I charged a nominal fee for this work, basically fuel and time at $20/hour. To dig up one of these plots by hand would take most of a work week. Thick sod and heavy clay.


Monday, April 20, 2009

Hoophouse construction, part 2 (of 5)

This is day 2 of the hoophouse construction project. Click on pictures for bigger versions. I changed the design a little to raise the hoophouse by 3', and used 8' posts because of the soft dirt we're putting it up on. I'm concerned about the pipes being pushed down by snow load. Longer pipe means more friction to resist that push.


That's Jose and Carlos working on the hoophouse. It's taken 16 hours of labor to assemble and tweak all of the trusses so that they're identical. For this particular hoophouse there's 13 trusses and to get the best structural strength out of them they want to be identical and oriented properly, which in this case means that we level the post that goes into the ground, and then make sure that the members are attached in an identical place on each side of the hoop. I'm talking about the distance between the top of the stake and the horizontal element at the top of every other hoop.

These are pretty big structures; here's my brother Bryan standing on a 10' tall ladder for scale and perspective.

Three reasons for the side rail design:

When first constructed this house had a 2x6 along the bottom at the outside. I've changed that to be a double row of 2x4s, one on the inside and one on the outside, and a 2x4 on the inside. You can see the start of that rail on the right in this picture. The wood inside isn't necessary for the greenhouse, but it's there so that I can run a 3' tall chicken wire on the inside to prevent poultry from pecking holes in the plastic if I decide to house poultry in this hoophouse. They like pecking at water droplets inside the plastic and poke holes in it that look like buckshot.


The pictures above is of the damage turkeys have done to another hoophouse that I'm housing them in.

Having a rail like that also allows you to build benches into the greenhouse if you wish, or even do both -- make a 3' tall bench, use the space below to house chickens, and above to grow plants.

The final reason for the side rail is insurance in case any of the bows sink. The side rail prevents the bows from being pushed down too much, and allows the load to be spread evenly along a side. Since there is effectively no bottom under my soil -- it's at least 160' of river bottom mud here -- I have to think about everything sinking. My barns have giant footings under them, big flat plates, the hoophouse has a side rail, etc.

This hoophouse is assembled with 5/16" bolts, most of which are 1.5" long, some are 3" and some are 4". The air compressor and an airgun makes the assembly much shorter and quicker.

Labor costs are higher because we've spent a lot of time fiddling with the trusses to make sure that they're exactly right and identical. Once the plastic goes on you can't adjust anything, and for maximum strength you want it perfect.
We use the duct tape to cover all bolt heads and sharp edges on each frame member. The top of the ground stake, the bolts for the 2x4 side rails, the hangers used to hold the three length-wise pipes to each bow, and so on. No pointy edges, no rough surfaces. Only smooth pipe and duct tape against the plastic.

So the costs to erect this are as follows:

Hoophouse frame: $1,000

Hoophouse plastic: $350

Hoophouse channel: $350

2x4 railing material: 75 @ 1.72 each, $129

4" 5/16" bolts: 50 @ 1.10 each $55

Replacement nuts and bolts and fasteners: $70

10 rolls of duct tape: $35

50 8' x 1.75" steel posts (chain link common post) , $705

Labor: $600

Total to "plastic ready": $2994

Tools used:

Front loader from tractor to drive posts into ground

T-post fence driver for fine adjustment of post

Spool of bailing twine for keeping things straight and checking diagonals

100' tape measure

Air compressor and airgun for spinning nuts on and off, plus a set of deep sockets so that you can spin a nut on a longer bolt.

Hammer

5/16" drill bits and electric drill (too many holes for cordless)

Laser and regular level

6" pipe cutter

1 8' length of galvanized pipe for those holes that were tough to punch; we'd push this in, drag it back out and put in a weaker pipe.

10' A frame ladder

Lumber crayons to mark pipe

Sunday, April 19, 2009

The long pig farrows

The long pig is a china/hampshire cross. She's named the long pig because she is really much longer than the other pigs. I thought it would be interesting to throw some longer pig into my herd, so kept her and bred her instead of selling her earlier.

I got her from a fellow who thought that he wanted to pig farm, but then realized about 4 months into it that you actually need to care and feed for the animals every single day. Surprise!
I'll buy individual animals if I think that they're nice looking, or entire litters from other farmers from time to time. I do that to have the opportunity to grow them out and look at them to see if there's something interesting I'd like to add in terms of genetics to my herd. The jury is out as to whether the long pig will work out on pasture as a mother though. Hope she does.

The color variation is pretty fun. You can see the faint outline of the characteristic hampshire stripe on the long pig -- the white on the front shoulder with the black rear. But the piglets are wildly spotted and dappled. Click on the picture for a bigger version.

While I'm taking these pictures the long pig is giving a serious of low contented grunts as she nurses her piglets. GRUNT! GRUNT! GRUNT!

Saturday, April 18, 2009

The black pigs beauty regimen

The black pig was looking particularly fabulous today, and I thought I'd share her beauty secret: Mud. Lots of Mud.


The black pig is pretty pregnant, and today it was sunny, and, for her, a bit warm at 60 degrees. So half the day she spent laying in the hay and making a nest, with frequent visits to the spa -- a wallowing hole about 30 feet away that she maintains as mud. She actually bastes herself in the mud, first one side, then the other. You can see here that she's half-done. She'll flop over on the other side in a second.

So if you'd like to have silky soft skin and hair with volume and the texture of a good hairbrush, you too can follow the black pigs regimen

Friday, April 17, 2009

hoophouse construction part 1 (of 5)

I've been looking for a hoophouse for a while; I've got an area that isn't very good pasture, and a greenhouse is a pretty versatile structure. You can brood birds in it, shelter breeding flocks, grown plants, all sorts of things. So when I saw a fellow about 100 miles away that was selling 30'x96' greenhouses for $1,000, I bought two.
Here's my trailer loaded with the frames, members, plastic and channel for the greenhouses. I figure the load is about 3,000lbs.
Here's the area that we're going to lay out the greenhouse on. The specs say 30'x96', but I'm a bit of a skeptic. So we place the corner posts, and then assemble one of the trusses to put it in place to make sure that it's really 30' and everything fits.

This little laser level allows me to check the level across the structure, from the top of each post to the top of the other. I can also check level front to back. To make sure that the structure is square, after the rough layout was done, I drove two of the corner posts and then used a piece of twine to do a diagonal measurement, and then drove the other two corners. After that, I measured again to ensure square. Square and plumb is important for best structural strength.

Here the first truss is set into place. Yes, it's 30' wide. This house was originally set up with 4' posts, driven 2' into the ground. That gave you a clearance of 9' to the bottom of the truss. My tractor is 9' tall, and I'd like to be able to drive my tractor into this structure to deliver materials, so I purchased 8' posts, and drove them 5' into the ground. This leaves 3' exposed, and gives me a height of 10' to the bottom of the truss -- so my tractor will fit.

The hoops on this particular house are spaced 4' apart. Here we've driven every other post, and mounted the first truss. This structure is bigger than it looks in the picture; I'm erected both of these hoophouses end-to-end, so I'll end up with 6,000 square feet under roof, approximately 30' wide and 200 feet long.

County regulations require a setback from the property lines of 25' for structures that might house animals, so I've set this structure 26' from both the side and and back property lines as a precautionary measure. When you take down the hoophouse you ruin the plastic; so this ensures that if there is an issue the setback won't be something they can bug me about. It's considered a temporary structure so there should not be an issue.
My land is river bottom, so there's no rocks to deal with. I used 8' posts driving 5' deep to provide both anchorage in the event of a flood, and plenty of friction to allow the frame to resist being pushed into the ground by snow load.