Saturday, December 23, 2017

Closing in on 2018 - bought a(nother) new farm

It's been a while since I last wrote about the farm.  I've had an issue I cannot talk about right now occupying my free time, and plenty of stuff on the farm occupying my work time. 

I purchased another farm down the road from me this year; another 40 acres and a house and barn.  I bought it mostly for the land; I wanted more cropland that I owned - but was pleasantly surprised to find that someone about 40 years ago had planted really nice things around the house. 

So the new farm came with a mature american chestnut tree, a mature black walnut tree, the biggest fig tree I've ever seen, and a variety of other homestead-like plantings.  I spent a little bit of the fall
clearing the blackberries and overgrowth and I'm looking forward to completing that work this spring.  the black walnut tree and chestnut tree are about 75' tall, and the fig tree is 30' tall. 

I purchased the property on an as-is, where-is basis; I figured that if the house was too terrible I'd just
tear it down, but it turns out to need some work to improve it, but it's good as it is.  I did decide the
kitchen was too terrible and rehabbed it, and I've found some folks who seem happy to live there,
so I'll rent it out and see how that goes for the next year. 

The purchase price for this farm was a little under 8k/acre, which is a little more than the 6k/acre
I paid for my main farm, but still within reason.   With a little juggling I can probably develop
and sell an acre of it as a mobile home lot or a house building lot and pay off the property if I can
do it before the housing market in this area crashes - because I think that we're overvalued right now
in washington state, and I can't see it going up much from here. 

When it's low I buy, when it's high I sell, and I've been selling property this year. 

Around the farm: 

Pig business is good.  Currently have 60 sows and 5 boars.  Seeking a market for my cull sows and
hate selling them at auction, but when they have to go, they've gotta go.  holiday sales of pigs
are always pretty fun; lots of cultures have pigs as a celebration meal, so I've got groups of
happy customers processing their own pigs almost every day of december; I was offered a bit
of crisped fat and salt by a romanian family that was here yesterday; it's their favorite part of
the process-the-pig tradition, and I accepted it with a smile. 

Milking cows are all dried off this time of year;  I'm aiming my calving at march of the year so that the cows can be on the best grass of the year as they produce milk for their calves and me.  I only milk 1 cow each year, as the 5 gallons or so of milk that single cow produces is more than I or even my extended family can consume, and you can only make so much cheese :)

I've cut my chicken flock down to a rooster and a dozen or so young laying hens; keeping chickens in the winter is a bigger chore than I need right now, so I'll wait for warmer weather to bring in the roosters.  i like to raise 300 to 500 heritage roosters a year and sell them to the live chicken folks.
I'll order the chicks delivered in late feb or early march and sell them through the summer as they
reach the weights that people like to eat them at.  they grow slowly compared to cornish cross, but the demand is good, and the price is good. 

I'm going to move the majority of the cows to the new farm in the spring; which will free up the ground here for corn, and I'll plant 40 acres of corn next year.   I'll also plant some wheat, alfalfa and orchard grass next year, and try some soybeans as well.  I like the idea of growing my own feed for
my own animals, and I think I have enough land to do the job right now.  It makes economic sense because I'm my own customer for the feed, and when I buy pig feed I'm paying the equivalent of $10 a bushel for corn/soybean mix and I can raise the corn for about $3/bushel, everything included, which means I think I can cut my feed bill by at least 30% for the carbohydrates, but the protein part I'm still working on. 


Monday, August 21, 2017

Drowning in honey

There are worse problems to have :)
http://westernbee.com/pages/beehive.html
My bee setup is basically what's shown in the picture above; I don't use a hive stand - I use shipping pallets so I can pick up the hives and move them with equipment, and I haven't ever needed to use a queen excluder, but some folks do.  

This year has been really good for the bees.  Hot weather and good blooms for most everything that they like.  I started the year with 4 hives, now have 8 due to swarms, and I'm pulling the honey supers off the hives.

Every hive has produced honey this year; even those that started as packages and then swarmed.  The lowest producing hive was at 2 gallons of honey, the highest producing hive between 6 and 7 gallons (each!).

So my eight hives have produced 22.5 gallons of honey, which doesn't sound like a lot until you go to
bottle it - I've produced 17 cases of half pint and pint jars so far, and still have honey to go.

The weather has been cooperative - hot and sunny (with the occasional eclipse), so opening the hives and working with the bees has been relatively easy.

There's still some honey to be gathered out there, and I'm pulling the honey now by swapping empty for full.  I'll pull the honey supers off of the hives when it cools down in september so that the bees have a smaller area to keep warm during the winter.


Thursday, August 10, 2017

Big barn - closed in! Wellhouse - closed in!

Finished two of the projects for this summer - the well house and the big barn.

Closed in means that the roof is on, and the walls are complete, and it's weather-tight.  Work still needs to be done, but it can be done inside, out of the rain - and on a non-emergency basis.  It's always nice when you can choose the time you work on something, instead of having it chosen for you :)

 Plywood sheathing is expensive but it holds up a lot better in wet and damp environments, and the wellhouse is pretty damp and cool most of the year.   Plywood is $19/sheet, OSB, a more common alternative, is about $8/sheet

 I framed the wellhouse with 2x6 to allow space for insulation and to be able to bury the plumbing in the walls if I chose.  Most of it I left exposed for easy maintenance.  the old wellhouse is in the picture above, to the right on the bottom.  The new wellhouse is about 30" above grade, the old one is built on grade.  the old one floods - the new one won't.
 I had some sheets of siding from the big barn project - so I used that, and some trim, and picked a door that matched the existing door on the dairy office for the farm, so it has a nice consistent look with the rest of the outbuildings.

It looks a little odd with the door set to the side, but that's so that I can stack pallets of salt to the left of the door.  The local hardware store gives a much better price for salt when you buy a pallet at a time, and I use a fair bit of it to soften our (very hard) water.

 This is the south face of the barn.  Man door on the far left, 16'x23' sliding barn doors in the center.  The yellow bollards are there to stop people from running into the door frame with equipment - hopefully they won't, or the bollard will prevent damage :)
 This picture was taken as we applied the last bit of skin to the barn.  The top 3' of the east and west walls are clear panels, and they provide plenty of light on the inside so you don't need artificial light during daylight hours.  Much more pleasant (and cheaper!) to work with.

 The barn itself is 250x100, and it's clear-span.  No pillars or anything in the center.  The ceiling in the center (measured from the floor to the lowest point of the structural steel, is just shy of 20'.

I include this picture of us attaching the barn doors and adjusting them to provide a little bit of scale.  Its really hard to see how big this barn is until you put two people on top of one another, and can have a 3rd and most of a 4th and still not hit the top of the barn.  I rented the manlift, and was glad I did.  Would have taken much much longer to do this with ladders or scaffolding.

We have two strips of concrete to pour in the big barn to complete the floor, but that can now be done anytime - we have a roof and walls, and can heat the space if we need to.

Wednesday, August 2, 2017

Rebuilding the well house

 The well house that's served the farm is about 70 years old.  And it's in pretty poor shape.  It has the added problem that it's built on grade - that is, on ground level, and it can get flood water in it.  This building flooded 3 times in 2015 - a bad  year, to be sure, but you really don't want important farm infrastructure to flood. 
 The old well house is in the foreground to the right.  The new one is getting framed in the background to the left.   Since we had concrete trucks on site because of the big barn project I poured a foundation and walls for the well house, using the elevation of the main house as a guide.  That lifted the well house about 30" above grade, which should keep the interior safe from future floods. 

Here the sheathing has been applied.  The white pipe out the doorway is the temporary plumbing.  The output from the well is already in the new well house, I rigged up a temporary pipe from there to the old wellhouse until I got the whole system moved. 

While I was at it, I also improved the well house in the following ways:

installed a water manifold with a valve for every farm area that this well house serves, so you can turn on, or off, portions of the farm water from this building without affecting other areas.

Installed an anti-backflow valve, which isn't really needed here - I have an artesian well, and water flows out of it even when the pump is turned off - but it is required if I ever want to have the farm certified for food production, like cheesemaking or as a butcher shop.

I built the new wellhouse a little larger than the old one to allow me to stock salt (used by the water treatment equipment) in the wellhouse itself.  I made it large enough that I can stack a pallet of salt inside and still have room to access the valves and equipment.  The local hardware store gives me a discount for buying full pallets of salt, and salt doesn't spoil (as long as you keep it dry), so I try to buy a years supply at a time.  

The concrete pad for the well house also serves as a base for my farms standby generator, which will sit on the side opposite the doorway shown. 

I think I'll have enough spare panels and metal from the big barn project to roof and side this new building with the same metal and trim, allowing me to match the overall farm building color scheme. 

Monday, July 31, 2017

The big barn project - update

 Putting up wall panels on north wall.  Man door is already in
 One panel at a time - 3 man crew makes this a little easier.  One guy in the lift, two guys on the ground. 
 Decided to pour a concrete wall along the base of the wall to match the original wall.  Makes it harder to drive through the wall with equipment, and makes it possible to scrape the barn with a tractor a little more safely. 

 put a 10x10 door in the north wall for general purposes, and bollards around the entrance to keep everyone in line :)
We finished  this section the next day.  The south wall is a little more complicated - it has a 16' tall x 24 foot wide barn door in it, to allow me to drive my combine or other large machinery or trucks into the barn (think semi-trucks).  Working on that this week.


Saturday, July 29, 2017

A friend in need...


In these days of debate about health care, a friend of mine has come on very hard news.  I've written about Pauls farm on my blog, and I've watched him work hard at his enterprise, and I just don't know what I can say about this latest news that he got about his wife and son.

I'd like to do what I can to help him through this, and if you have a little extra, a donation for
the Johnson family would be much appreciated.

You'll find the gofundme page here

Sunday, July 2, 2017

It's bee swarm season

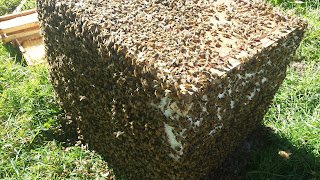
It's the tail end of the honey bee swarm time of year; my hives have produced 4 swarms this year; this is the latest.  It's a big swarm; the origin hive was booming and I'm happy to see this queen doing so well.  Here's a video of what it looked like in the fruit tree the swarm chose
 

20170702_170425 from bruce king on Vimeo.
 
To capture the swarm you need a container of some sort.  In this case I had a couple of honey supers (bee boxes usually used to contain surplus honey produced by the hive), but you could use a cardboard box for transport purposes. 
 
What you want to do, the only thing you have to do, is capture the queen bee.  Every other bee will follow.  But I've actually never seen a queen bee in a swarm - there's just too many other bees surrounding her.  So I orient my box below the swarm, and then pull a couple of frames out of the box to give the bees some room, and then give a firm shake to the branch.  Most of the bees fall off the branch, and this next video is about 3 seconds after I shook the bees onto my capture box. 
 

20170702_170826 from bruce king on Vimeo.
 
My goal was to get most of the bees into the box, and I got a big part of them, but there are still a lot of bees outside the box.  So I carefully, gently, put a lid on the box to partially restrain the bees there - there's a big hole in the top of the lid and the bees can enter the bottom of the hive too, and then I watch the bees to see what they do. 
If I've captured the queen - if she's in the box - the entire swarm will go into the box without any further action on my part.  So this video is me watching the bees to see what they'll do
 

20170702_171836 from bruce king on Vimeo.

More bees are going in than coming out, and so I figure that I must have captured the queen.  Now I go away for a couple of hours to let the bees sort themselves out; I'll check the box around sunset; it'll be full of bees and any stragglers that haven't found the hive by then probably won't, so I'll cap the entrance and then move the new hive back to the bee yard. 

My standard hive is two deep supers on the bottom, with honey supers above.  I didn't have any deep supers ready, so I'll disrupt the hive once more when I move the bees from these honey supers to their new permanent home.  I'll probably take a comb of honey from another hive and give it to this hive so that they have plenty of food available, and I'll probably offer this hive new wax to build new, fresh comb with. 

Swarming will cause the bees to build new comb, and while building new comb does take time and energy - honey - having them build a new set of combs for this hive is a good practice.  Nice clean house for them to live in.  I'll provide flat sheets of wax that are stamped with hexagons. 

I don't expect any honey production from this hive this year, but I do expect them to produce enough honey and pollen to keep themselves in good shape this winter. 


Thursday, June 15, 2017

The really, really big barn project

When I purchased the property it came with some big barns; about 50,000 square feet of them.  The largest barn was set up to house 300 dairy cattle, but honestly I have never been impressed with it.

The big barn in 2013, Sean there for scale
The barn itself is 250'x100'x20' tall, and the tall sides mean that rain would blow in from every side, so much so that the outside 20' or so of the barn was basically never dry - I couldn't keep any animal there.  The previous owner of my farm froze 38 dairy cattle to death in this barn, which gives you an idea of how cold it could be, rain, snow or shine.

the other problems were that it had been built without any water supply - as in no water within 100 feet of any side of this barn, and the gates and setup were, well, odd.  To me, anyway.  Probably perfectly good for holding full-sized holsteins or jerseys, but certainly not very good for pigs, and not at all good for small pigs.

Over the next few years I did do some things that made the space work better for me but I kept having problems with wet, cold and generally not very welcoming conditions inside the barn.  For as much roof as this barn has it wasn't very dry anywhere.

So I finally bit the bullet and am putting sides and ends on this barn

The basic barn structure is there.  I had to add girts first, and then start putting up the siding.  To keep the barn useable without artificial light I designed in a 4' clear panel at the top of the walls, which I'm hoping will provide enough natural light inside that it can be used without artificial light if you choose.  I'll still put lights in there so that it can be fully lighted if need be, but prefer to have a natural light option.

This is honestly the largest building i've ever worked on.  I walked out a few hundred feet to get the picture above.  Notice the manlift and people a little to the left of center of that picture.
 My brother Bryan, my Nephew Dillan and his college roommate Alex are helping me with this project.  Extra money for the college guys.  No idea why Bryan is helping ;)

I grew up remodeling houses with my mother, and so my first jobs were all basically construction jobs, and I forget sometimes how foreign hand tools are to the xbox generation.  The first few days were teaching these kids how to use the tools and then watching them to make sure that they were being safe.  Harness and safety glasses.  I should probably get them helmets, too.  Making a list.


This is what the finished sidewall looks like.  the top 4' clear panels are attached; the building wasn't sided prior to this, and so I'm going to have to extend the roof a few inches to provide an overhang before I attach the gutters.  I'm waiting on the roof extension metal now; when it arrives we'll wrap up this side.

On the "you never know until you try" - the 4' clear panels do provide enough light inside the barn so that you don't need more light for most tasks.  that's nice to confirm.

Sunday, May 7, 2017

Farm activity summary

 Out in the hayfield the alfalfa and orchard grass are responding well to the weather.  Lush growth and lots of it.   I never have the weather at this time of year to make grass hay, so I'll be turning the cows loose on it to graze it down a little.  Hay weather in a month or so.  The cows will enjoy this.

 When I planted the vinyard I put down some alfalfa seed between the rows with the idea of grazing it with some sort of animal.  I'm using piglets right now, and the mix is about right, so I'm moving 50 pigs down the rows and they're doing a pretty complete job.  Simple pen of hog panels attached with high-tensile coils.  they're pretty easy to move, and for this size pig are more than sufficient to contain them.
 The pigs are doing their part - in this case I'm grazing it down to bare earth, and planting buckwheat every time I move the pen.  The buckwheat is good for the soil, good for beneficial insects, and the pigs like it, and it competes well with the alfalfa.  Unlike the alfalfa it's an annual, so it'll go back to alfalfa mostly next year. 
If you look at the top of the photo here you can see the re-purposed calf shelter bedded with straw that I provide to the piglets for shelter.  Not pictured is the automatic water and the free-choice food.  They will remove vegetation even if they have all the food they can eat.  Pigs like a varied diet and they love to be on the ground and moving dirt.  So they till it up and weed it for me in one pass.

The final weeding for the grapes is to get the weeds that are in the row, between the vines.  I haven't figured out a way to do that with pigs, so I do it the old fashioned way - with a hoe and a book on tape.  Kinda routine, relaxing word.  good way to commune with the vinyard for a half hour a day.


Tuesday, May 2, 2017

Planting season - fixing the disc harrow

 It's that time of year again, and I'm inspecting the disc harrow prior to using it for this season.  I know that it needs a couple of bearings replaced, and I give it a once-over to see what else needs to be fixed.  I use a yellow pad and jot down everything; scrapers need adjusting, bearings replaced, triangle warning sign on the back needs to be replaced - it's really faded and I'll be on the road with this implement - and I need to replace a red reflector on one side, also for road use.
 The disks are mounted on a square stock axle with a couple of nuts on the end holding it together.   So to fix the bearing you have to remove the jam nut and then the retaining nut, and then start sliding the disks and spacers off the axle.  One of the bearings I was replacing was on the nut end of the axle - which made it easier to replace.  It's hard to tell sizes here - the disks are about 24" tall, so that pipe wrench in the first picture is a pretty big wrench - maybe 24".  I need the length because they're on tight, and rusted.  Some oil and elbow grease and things come apart.
 The new bearing comes with a gasket, and I inspect the kit carefully.  Some of the bearings on agricultural equipment are elliptical - the outer case is not round, and sometimes there's something you should know in the parts.  There are no instructions.  In this case one of the bolts that holds the two bearing cups together was about half the lengthe of the other three bolts.  That one goes down.  got it.
 I replace the bearing on the nut side, and move on to the second bearing,  I take the whole thing apart and pull the axle out, and then thread it through the new bearing, and get it all back together, but I'm short about 2".  Where did I lose the 2"?  I look at the bearings, the discs, look to see if I'm losing space between the discs - cannot figure it out.  Until I spot what's in the picture above.  When I removed the axle I neglected to remove the old bearing run.  So i have to take the whole thing apart again, remove that bit, and then put it all back together.  So that killed 90 minutes.
the disc assemblies are very heavy - maybe 250lbs or so, and since I'm working on it suspended in the air I'll place a block or jack to stop it from falling on me.  These things are sharp.  

Once I get the disk axle back in shape I put the scrapers back on.  You can see them in the first picture - they're blades that scrape the dirt that collects on the disk off, and are used when you're disking wet or clay soil - they keep the disk from clogging up.  Since I'm working with them I inspect each blade and respace a couple of them, and then go over the other 4 scraper units and adjust those.

that done I grease all of the bearings, new and old, replace the triangle reflector, and I'm done.  I spin each assembly to make sure that they spin free and easily, and nothing is scraping, and then pull the disc out of the barn, fuel and grease the tractor, and then check the oil.  Ready to go for tomorrow.

I try to do the maintenance of the tools in the winter, but it seems like there's always something that needs to be fixed.   Next implement to inspect is the plow, and after that the planter.


Sunday, April 30, 2017

gardening with pigs

One of the things about gardening is removal of the weeds or unwanted plants, and replacing it with plants that you want.  Lots of people do that with tractors, or by hand tools, or by hand, but I do it with piglets.  


 In this case I made a small pen out of hog panels - They're 34" tall and 16' long.  I string them together using bits of high-tensile fence wire bent into spirals.  If you look on the left side of the picture above, you'll see one of the coils there.   This is actually one of the best ideas for this sort of thing that I've run across.  High tensile fence is about 3 cents a foot, and so this closure costs me between 30 and 50 cents, and is re-usable.  To attach two panels together you start at the top and "screw" it into the panel.  The wire is plenty tough enough to hold the panels together, and the joint can be used for a corner or a sharp bend, so you don't have to bend up or damage your hog panels in any way.  Pretty slick!

So I make a pen with these panels, drop in a calf dome  for a shelter, and add some piglets.

The top picture in this post shows the difference that one day of grazing by the piglets makes.  Most of the vegetation is gone, and all of the above-ground weeds are removed.  Sticks, brush and trees do slow the weeding process down, but the pigs will remove everything - and then I'll creep the pen in the direction I want to clear.

This works very well between trees in an orchard, between rows of grape vines, or in garden areas being prepared for planting.  If I'm going to plant something in this soil I can either lightly till the soil to remove the roots, or sow directly into the soil.  The pigs have added urine and manure to the mix, and have trampled and chewed on everything they didn't want to eat, and even if the weeds have roots remaining it's not every hard to keep them in check.

In this case I'm having the pigs clear out blackberries and volunteer grass from between the rows in my vinyard .  I planted the vinyard in 10' wide rows to allow me to do this sort of activity; I just bend the hog panels so that the pigs can't get at the young grape vines and move it 5 to 10' a day.  It moves pretty easily; I use pull the panels by hand, and the pigs walk inside their pen, and enjoy the new salad bar.

Note:  While pigs do enjoy rooting and will supplement their diet with whatever they find in their pen, I'm still offering them a complete ration free-choice.  They don't have to be hungry to do this sort of work, and little guys like this need proper nutrition to keep themselves in good shape and to grow as they should.

If you run across someone who claims that pigs can be raised on forage alone take those claims with a grain of salt.

Friday, April 28, 2017

Fences and cows

I have an old railroad grade that runs along the south edge of my property - the county purchased it a decade ago for use as a trail, and I really hadn't thought much about it until they came and mowed it, and suddenly I've got a cow highway!


So add another 5,000 feet of fenceline to my list of things to be done this spring.  As I did with the orchard fence I put up a 4 wire setup.  I put up double H braces every thousand feet or so, and a field post every 100' or so, or where the ground elevation rises or falls.   It's funny; whenever I'm out there alone in the pasture I get the distinct impression that someone is watching me and...
 
They are!  The cows are acting nonchalant, but they'll drift over and eventually they'll form a semi-circle around me to solemnly scrutinize whatever fascinating thing I'm doing.   It's a bit of a chore to put the fence up, but I do like working with my hands and doing a neat job of it.  3 days of work and I've got the first 2,000 feet fenced; I'll finish the other 2,000 feet Monday or Tuesday of next week. 

Because this is a permanent fence, I'll take the time to run my track hoe down the fence line to smooth the ground underneath the lowest wire - I want a consistent 12" clearance, and I'd like to be able to be reasonably sure that the fence is able to contain all of the livestock, pigs and cows alike, so a little extra work now means that I should have years of trouble free fencing. 

This year I'll be doing cross fencing to make the pasture into paddocks that I can use for different purposes; some for hay, some for corn, that sort of thing.   More on that later. 

Wednesday, April 5, 2017

High tensile fence, 5 years experience

There is nothing that a cow finds more delicious than young fruit trees, and they'll destroy them if they get the chance.  So I'm putting a good fence around my new orchard to protect it. 

I've been using high-tensile fences as my go-to fence for the last 5 years.  When I first started I made 8 or 10 wire fences; right now my current standard is 4 wire fences, and I find that works well to keep the pigs and cows where they should be, and also works with dogs, which was a bonus for my airedale pack.

When I started using high tensile fences I used 4x4 posts for the braces.   Even pressure treated they don't hold up very well to cattle and pigs; a cow won't break your high tensile fence running into it, but may very well snap the post and lay the fence down in that area enough so that they can get out.  So I switched for a while to 6x6 posts for the braces, and then downgraded to 4x6 braces for cost reasons.  My current braces are constructed of 4x6 posts, and the field posts are also 4x6 to make them more resistant to snapping if they get heavy contact from livestock or a careless tractor operator.
H brace details.  Black is wood, green is wire
 High tensile is not meant for short distances - it's great for long runs, but at the end of every run there needs to be a brace, and most of the time it's a double H brace.  The picture above shows a double-h brace (top) and a wire-reinforced double H brace, bottom.  The wire helps support the H brace against pulls to the left and right, and if you're going to have a good tight fence you need this sort of really sturdy H brace to make it go. 

In my area 4x6 timbers are $18 each, so the brace itself costs $90 for the wood.  I use (3) 80lb sacks of concrete at the base of each post at $4 each, adding another $36.  Each individual line will need a spring and a tensioner, that run about $8 each, so for my four wire setup you're going to add another $32.  the ceramic insulators that I  use are a couple of bucks (more on these later).

I mention that because its' basically $126 in material costs for each end of your run, plus $32 for the hardware between it.  The wire itself is about 3 cents a foot.  For long runs I put a double H brace every 500 feet, or on either side of a gate opening wherever they are.

So the cost of a high tensile fence 4 strands and 50' long would be (126 + 126 + 32 + 50*4*.03) for the ends, and $18 for each of the two field posts, for a total of  $326 - or $6.50/foot

The cost of a high tensile fence 4 strands and 500' long would be $632 or $1.20/foot. (the brace costs + 16 4x6 field posts)

The longer the run the better the economics are. 

I'm describing a really hefty brace for a reason; I've pulled braces out that were set on driven-posts, were constructed of too light a timber, or just weren't beefy enough and I squished them as I tensioned the fence.  If you want a good fence you make a good brace. 


My final brace design.  Red are electric wires, black are inert
 The picture above shows an end-of-run fence brace.  I electrify the top and bottom wire of the brace.  The wires are spaced 1' apart, starting 1' off the ground.  I have tried wires lower than 1' and it's just too much of a nuisance with weeds and other stuff contacting the lower wire.  12" seems to be low enough to deter pigs, but high enough to reduce fence shorts. 

The top wire is 48" above the ground level, and is the primary wire that keeps the cows in. 

The two wires in the middle are just there to prevent animals from ducking  under the top wire, or jumping over the bottom wire.  I will place field posts so that I can direct the wire up or down to follow the ground contour, and I'll smooth the ground so that there's no depressions under the fence.  

I used to run my hot wires across the H brace but I had problems both insulating the hot wires from contact with the brace reinforcing wires (green in the pictures above) and with the posts.  there are various plastic tubes you can use, but I've never been happy with any of them.  I've switched to ceramic insulators and they do the job nicely. 
Ceramic insulator that is considering flipping (bad)

ceramic insulator being good

post ceramic insulator

Note position of ceramic insulator outside of brace area. 
 I put my tensioners in the brace area.  With the ceramic insulators placed, I can then tighten the fence without having to turn the fence off, and I have a cleaner electric fence line - so I can go longer distances and deliver a better shock.  The less contact the live wires have the more range you get out of your fence charger. 

So I'll make a brace at one end, and t hen the other, and then I'll run a neutral (non-electric wire) between the two.  I'll tension that wire, and that gives me a line to place my field posts.  I've settled on 30 to 40 feet between fence posts, and found that for a pretty fence an even spacing is all that you need.


Sunday, April 2, 2017

Cultivating and bees

Note:  if you are in the pacific northwest, and want to keep bees, THIS IS THE TIME TO DO IT.  You have the month of april to get your hive started, and there's plenty of places selling packages that are local.  Check the farm and garden section of craislist in your area or your local bee store.  Beez Kneez in Snohomish is a good one.
tilling between the rows of berries
 This is where a straight row really pays off.  The rototiller fits exactly between the rows, so tilling up the area between the plants is pretty easy.  I put down a bunch of compost prior to the tilling, so it's mixed in between the rows.  This row is the berry row; marion berries and raspberries.  Several varieties; this year I'll take a look at how they are doing and cull the non-performing plants in favor of the cultivars that do well.  With marion berries and raspberries that's pretty easy - take parts of the plants that work and just move them down the row.  Marion berries will grow roots if you bury the tip of the vine in the soil.  Raspberries can be propogated by digging up a bit of the growing plant.

a 3lb package of bees with queen
 The packages of bees arrived today, so I went and picked them up.  I set up a new package in a deep super, which is the bottom box in a bee hive.  The new bees will chew their queen out of her cage (she's held in by a marshmellow) and spend the next day or to scrubbing their hive and making it their own - they will patch any holes in the hive, start producing wax to build out comb and generally get the hive ready for business.  After they concentrate on that box for a couple of days I'll add a second box to give them more space.
Watching the stragglers putting themselves in the hive
The metal circle in the top picture of a package of bees is a can with sweet food for the bees.  Sometimes it's sugar, sometimes corn syrup, they feed off that while they're being shipped.  The queen is kept in a very small cage that is attached to the package next to the feed can.

So the process of "hiving" a package is to set the hive up with its frames, then take the center 3 frames out.  You rap the package on a hard surface to knock all of the bees to the bottom, and then carefully pull out the feed can.  That allows you to access the queen cage, and you pull that out and then replace the can to keep the rest of the bees in the container.

The queen cage is capped with a small cork.  Making sure not to let the queen out you replace the cork with a marshmellow, and then place the queen at the bottom of the hive.  Then back to the pack, another sharp rap, and then you pull the feed can and dump the 10-15,000 bees into the space left by the three frames.  You'll have to shake it a bunch of times to get most of the bees out, and then  you carefully, and gently, replace the frames.  I use a hive inner lid, which is shown, and it has an oval hole it in.  I'll gently place that on top of the hive and then let the straggler bees find the hive and enter it via the hole.  Around sunset they are all in there, and I slip the lid on and that's it.

I don't wear protective gear doing this; the bees are usually pretty mellow, but I do use a little smoke.  No gloves, no veil. just calm, purposeful movement.  I think I'm getting less sensitive to stings; i did get stung once - i accidentally smashed a bee while lifting the hive, but that happens sometimes.

I like to listen after dark to the new hive.  What I like to hear is the chewing sound of the bees doing their housekeeping.  it's pretty subtle, but it shows that they are customizing their new home.

I restrict the entrance to the hive to a single 1/2" notch.  This allows the bees to keep raiding bees from other colonies out; a couple of guard bees can easily block the entrance, and this helps the hive concentrate on making their new home.