Sunday, January 30, 2011

New Butcher shop-Wynooche valley meats

I wrote about some hay equipment that I purchased and in talking to them about picking it up, they mentioned that they were opening a new butcher shop on their farm as an expansion of their long-standing business of custom cutting.  I'm very interested in small meat shop operations because that's the way that a farmer can keep more of the retail dollars for their product.  Selling wholesale is a good way to go broke quickly. The closer you can get to your customer the better. 
This is a family operation all the way.  Craig (pictured above) and Rose Gallington and their children run the shop, and it's located on their farm in the Wynoochee Valley, about 10 miles north of Montesano, WA 

 
The shop is concrete floored, with all of the fixtures in stainless, and it's spotless.  I asked Craig if he was WSDA or USDA, and he said that he'd just had the USDA inspector over the day before, and were probably going to get USDA inspected for both slaughter and cut-and-wrap.
 
That means that producers in that area will be able to sell cuts of meat and directly to food establishments, and will mean a higher price for their product than if they were to sell either farm-kill (which wynoochee meats does as well) or wholesale at the auction.   Small meat shops are one of the best things that can happen to local meat producers, and I'm glad to see these guys going towards USDA slaughter. 

I wasn't there for the meat shop, I was there to get the hay equipment, and when I asked to see their shop they were glad to show me.  They were cutting up some really  nice looking beef -- yak, of all things - and it had both a good amount of marbling and the lovely yellow fat that I associate with grass fed animals. 
This is the ribeye of the yak. 
butter yellow fat -- what I usually see with grass fed beef. 
Their facility is spotless, and if you'd like to have your meat cut in a local shop and you're in their area, you'll find them at 92 old wynooche road, montesano, wa.  360-249-MEAT (6328)

They also sell their own beef and pork, as C&R Cattle.  You can't get much more local.  Just wish they weren't a 2.5 hour drive from my farm (one-way!)

Haying equipment

I use 10 to 15 tons of hay every year for my operation; we bed pigs with it, feed sheep and cows, and use it for temporary shelters if we need to deal with a pig that farrowed in a bad place.  It's useful to have a stack of it, and it's cheapest in June/July when it's made.   We pick up up out of the field for the best price, but that means we have to be ready to get it under cover as quick as we can.

 Mark, one of the readers of my blog, spotted this and sent me an email.  This particular gadget attaches to the side of the hay wagon, and has a ground-driven chain that lifts the bale up.  That that means is that you'll have two guys on the hay wagon stacking, with the driver of the truck guiding the bales up to them.  Hoping that means less labor costs -- I've been doing it with a driver, 2 on the ground and 2 on the wagon to stack the hay.  

A note on hay costs:  the least expensive way to buy hay around here is huge bales.  Either 800lb round bales, or huge square bales - 4x4x5, for instance.  Purchased in huge bale form, you pay $120-150 a ton.  If you buy the same sort of hay in small square bales, it's $250-300 a ton.    I have a tractor capable of handling the big bales, but I prefer to use the smaller ones for bedding purposes.  For feeding cattle, the big bales are the way to go.   Picking the hay out of the field gets me a price of  $150/ton, inclusive hired help, stacked in my barn.  Hoping that this gadget will allow me to reduce my cost-per-bale for field purchases. 
The second gadget that they had for sale that I picked up was a hay elevator.  This is a 20' long one, with an electric motor.  Both of these items will take some tlc to get them field-ready, but I'm looking forward to not lifting 14 tons of hay over my head. 

Tuesday, January 25, 2011

blah. enough with the rain already

Spent a good part of today draining a 18" deep puddle on my driveway.  Perforated pipe, geo textile, gravel, backhoe.   

Monday, January 24, 2011

Crows are darned smart

Generic crow picture; didn't have my camera with me.

I'm walking back to my hay barn to check on the sheep that are penned near it, and when I'm almost there, I hear a piglet squeal.  They have a particular sound that they make when they see a larger pig for the first time, kind of a high pitched snorting sound, and that's what I heard. 

Sometimes piglets get out and get lost, it doesn't happen very often, but I spent a few minutes looking around for the lost piglet, under bushes and around the barn, didn't see it, and figured that it would come out in a while when it was ready, and i continued on down the road and checked on the sheep.  They were in good shape, water trough was full, lots of hay.  On the way back, at about the same place, I heard the piglet again, pretty clearly this time.  It was unmistakably a piglet.  Again i looked around, but this time I'm looking between bales of hay and under things and really spending some time.  Moving haybales.  No piglet.  Cannot figure out where it was. 

later that afternoon I run the tractor back there, shut it off and step down and darned if I don't hear that piglet again.  Snorkle snorkle snorkle!  Ok.  I'm going to find it this time!  From where I'm hearing it I think it's in the bushes on the far side of the perimeter fence.  So walk 200' to the nearest gate, go through and start beating the bushes.  30 minutes later, no piglet.  Then I realize that I've only got 3 litters of piglets, and I go and count my piglets.  No piglets missing from anyone.  What the heck? 

Ok,  back to the tractor, climbing into it and I HEAR THE PIGLET AGAIN!  but this time it's coming from above me, in the barn rafters.  How is that possible?  I look up and ITS A CROW!

This crow has learned how to mimic a piglet precisely.  It sounds exactly like a piglet.   Near as I can figure, the crow wanted me to move bales around in the hopes of either chicken eggs laid between them or to get at the mice that nest in the hay pile.   This crow is using me as a tool to move the hay.

Sunday, January 23, 2011

Final beam adjustments & floor joists.

 Making slow but steady progress on the barn.  Here my brother Bryan checks the level on one of the posts holding up the laminated beam.  I love the size of these timbers, but they're a little hard to work with.  That beam probably weighs 500lbs. 
 The joists are 2x12s, on 12" centers.  each one is held by a bracket, and each bracket needs 40 nails.  Each one of these 2x12s is rated to hold 4,000lbs of weight.  It's better to overbuild than under; We'll be storing tons of hay in this barn, and I want it plenty beefy. 

Now all we have to do is drive 4,000 nails.

Community service: Cleaning up the county road

It's funny, but every time that they raise the rates at the local landfill there's an increase in the amount of stuff that gets dumped near my farm.  Today I put together a crew of 4 people and we cleaned up quite a bit of trash and metal scraps that had gotten dumped on the side of the road.  If you leave the trash there it attracts more trash. 
Metal pile, heading to be recycled. 

One of the folks on the island took a small camper trailer, filled it with trash, and the parked it across the street from my farm.  Lovely.  Eventually it attracted scavengers, who did a pretty good job of taking it apart and picking out all of the metal, but it left a whole pile of plastic and fiberglass and stuff.  The picture below is Andrea and Blake, the son of an acquaintance i hired for the day (it's tough getting work when you're 16; and a day of cleanup is a double win) tossing stuff into the trailer. 

Some of the stuff that we're picking up has been there for a very long time.  Here's a big suspension spring that I found.  It's probably 20" long.  it's about time that it got recycled.   It's probably 50 years old. 


Saturday, January 22, 2011

ruminations on slaughter

One of the blogs that I follow, farm folly, just slaughtered their first two pigs.  I wrote this in the comments section of their posting.  You can find their posting and all of the comments here

"...Regarding shooting and sticking; with a proper shot the animal will just fold at the knees and fall over. you’ve got about 10 seconds to make the stick before the thrashing starts; much safer to stick the animal quickly and then step back. 5, 10, 15, 30 seconds — not much difference as long as the heart is beating when the arteries are cut. The shot doesn’t kill the pig; it just renders it insensible.


With respect to location, as the producer you can control that. Next time have the pigs penned in the area you’d like them to be killed when the guy shows up. I like to shoot/stick on a bed of coarse wood chips, but clean grass is good. The key issue is to have the last day be the same as every other day, so you can do that by choosing your kill area and having that be an occasional treat feeding area. Like a corner of your pen with a hog panel across it. Every week or two open the panel, toss an apple or carrot or whatever in there, and let them get used to that routine. Last day, when the farm kill guy comes, toss an apple in, close the panel behind, and you’re all set.

For hanging weight, if you’d like to save some money, have them remove the kidneys and the caul fat and leaf lard before transport to the meat shop. Consider taking the head off as well. most of the meat on the head is in the jowls, which make really tasty bacon, and those can be trimmed off pretty easily, so you’ll get most of the value of the head without having to pay cut-and-wrap fees for the skull and brain weight.

Leaf lard is very special stuff. Don’t discard it. Spectacular for making pie crusts and pastries and for baking in general.


Most folks that I’ve taught slaughter to are hesistant about the initial kill (“what if I miss?”) but not so much about the field dressing (skin, gut, split). What you will have a difficult time learning by yourself is how to inspect the organs and carcass for signs of disease, parasites or infection. Stuff like abcesses are obvious, but liver flukes are not. Butchering your own animal gives you invaluable feedback about their condition, too. How much back fat? How much intermuscular? How big are the loins? You can use that information to make decisions about your husbandry.


Finally, and generally, if you are considering hogs as part of your live-off-the-land exercise, consider feeding the hogs to a higher weight than you would normally. 100 years ago the primary value of a hog was the fat, and it is still prized worldwide. Properly done, a nice fat hog will provide all of the fat your household needs for an entire year. Lard, soap, lubricant, fat for frying, all sorts of uses. "

Friday, January 21, 2011

Hobby farms

My work boots and gloves

I was working with my pigs in the front pasture and I noticed a car driving by slow, and then park across the street.  When I was done with my chore, the car was still there, so I walked over and introduced myself.  Turns out that the fellow was a commercial fisherman who was working on a boat that is docked nearby. 

My farm is on an island, maybe a mile upriver from saltwater, and there are many commercial fishing boats that dock at one of the docks around the island; he fishes for salmon in the summer and fall. 

We talked a bit about the pigs, and he said that he actually drove out of his way to look at my pigs, and had taken pictures of them and sent them to friends. 

Towards the end of the conversation, he gestured towards my farm and said "that's a pretty big operation for Washington; certainly not a hobby farm".  It took me a minute to figure out why that bothered me, and then I said this.  "Hobby farms don't usually generate enough income to make a living off of, so even the smallest hobby farm is the farmers 2nd job". 

In fact, most of the farms in the USA, no matter what the size, are run by people who have an off-farm job, or off-farm income.  I've heard many people refer to "fake farms", or "hobby farms" as if they're second class citizens, or somehow worthy of scorn.  I think it's a labor of love.

Wednesday, January 19, 2011

Skinning practice

Andrea is skinning her first pig.  We had to put a sow down, and skinning an animal properly takes some practice, so she's in the center of the picture practicing.  The sow is hanging from the front bucket of the blue tractor. 

Andrea is a real trooper about farm life. 
Click on the picture for a larger version

Pig skin, unlike sheep or cow, sticks to the fat and is pretty hard to remove.  When you skin a pig you want to leave as much of the fat on the carcass as possible.  So the basic things are:  Have a very sharp knife, and retouch it with a steel from time to time.  Take your time and make sure that every cut is as close to the skin as possible.  Take particular care around the belly, because that fat is your bacon, and a poor skinning job will waste too much. 

And elsewhere on the farm...

I've been working with my sows to see if group raising works.  the problem I've had is that piglets that are even a few days apart in age out compete the smaller ones.  When I get two sows that farrow within a day of each other, I'll house them together.  These two are an example. 

They're both sweet as butter.  Docile and a real joy to work with.  No problems handling their pigs or working around them. 
And if it's chilly, it's a double warming blanket for the piglets.  Wall o' mom!

Beams up

Work is progressing on the barn.  The concrete has cured long enough that we can continue building the structure. 
 The joists for the first floor are laminated beams that I've collected for the past couple of years, from building demolitions mostly, off of craigslist, or just by driving by and asking about them.   4 of them are the same size, 3 of them are different sizes.  When I found a beam I'd look up how strong it was on a 19' span and if it worked out I'd pick it up. 
 The beams are set on solid 8x8 doug fir posts.  Here's the beam at one end, spanning the opening that end.   The clearance underneath the beams will allow the tractor to drive through, which is important for my operation.  Anything I can do with the tractor is good. 
 As each beam is set into place, we're careful to check level and plumb.  
Here's the next beam in place.  We'll complete the placement of the beams tomorrow, and then start on the floor joists that go between them.  I'm using recycled beams sizes appropriately to allow me to drive my tractor on them if I choose. 

Monday, January 17, 2011

Flood event #3

River is supposed to crest tonight at 31 feet.  Flood stage is 25 feet.  31 is probably ok, but the dike is under huge pressure.  Lots of water outside the dike, super saturated soil and its raining hard.  Guess I'm on call tonight. 

http://www.nwrfc.noaa.gov/river/station/flowplot/png/SNAW1.HG.0.0.1.0.png

Sunday, January 16, 2011

Chicken Curry pot pie

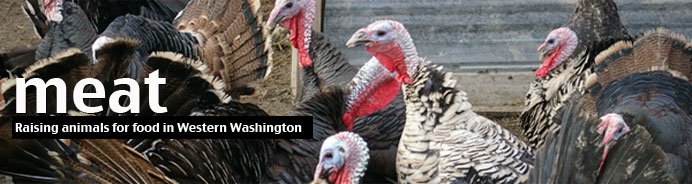
This is a recipe that I use for older chickens -- laying hens past their prime, or roosters.  I'll pressure cook the chickens and remove the bones, and then use the cooked meat . 

When I cook I like to cook a quantity that allows me to freeze the meal for some other time.  Pot pies are a quick lunch or dinner, and they freeze very well; they'll keep in good condition for 6 months if they're put in an airtight bag or container.  So when I do pot pies, I always do extras. 


Makes 3 7" pot pies: 

Ingredients:
  Filling: 
  3 cups chopped carrots and peas (frozen is fine)
  1/2 cup chopped celery
  1/2 cup chopped onion
  1/4 cup olive oil
  2 cups chicken meat
  1/2 cup milk
  1 1/2 cup chicken broth
  Curry powder to taste (2-3 tablespoons is a start)

  Crust:
  2 1/2 cups of all-purpose flour
  1 stick butter (frozen butter recommended)
  1 stick lard (frozen recommended)  (you want equal amounts of butter and lard) You can substitute shortening or more butter, but not as good)
  1/4 cup water
  1 tablespoon apple cider vinegar
  1/2 teaspoon baking powder
  1/2 teaspoon salt

  Tools & materials: 
  (3) 7" small pie pans.  I buy these for $0.11 each at costco. 
  1 baking sheet (roast the veges on it, then use it to bake the pies)


Preheat your oven to 400 degrees. 
Toss the peas, carrots, celery and onion in the olive oil to coat, and then put them on a baking sheet and pop them into the oven; remove them when they're golden and delicious. 

While the vegetables are cooking, put the flour, baking powder and salt into a food processor.  Cut the butter and lard into chunks and add to the flour, pulsing four or five times.  You want the flour/fat mixture to have small pieces of lard and butter mixed evenly through it.  Add the water and vinegar slowly, pulsing to mix it in.  At the end you should have a corn meal texture.  don't over process, and don't add too much water.  You want the dough to stick together, but not very much. 

Split the dough into 6 even portions, flatten into pancakes and put it into the freezer to chill. 

In a small sauce pan, put the milk and chicken stock, and warm it.    Add curry powder to taste.  Once the liquid is seasoned, add the chicken and fold in the vegetables.

Now go to your freezer and retrieve your dough.  Roll it out, put it into pie tins and spoon filling into it.   


Once the pies are topped, brush with beaten egg so that they get deliciously brown on top when baked.   You can freeze the pies or eat them immediately.  Cooked now they take about 25 minutes -- you only have to bake the crust.  Frozen they take about 45 minutes to cook -- cook until the internal temperature is 170 degrees. 

Use the baking sheet you roasted your vegetables on to bake the pies.  Enjoy!

Friday, January 14, 2011

Here's what I do to keep the pigs off the plastic.  But in this case the lower plastic was already tattered, so it's mostly to keep the little pigs in. 

4700 german farms shut down after feed contamination

3,000 tons of feed distributed to farms of all sort suspected of being contaminated with dioxin.  As a result, organic producers are becoming very popular.   Most of the closed farms were raising pigs, but eggs, chicken meat and other farms were affected. 

Dioxin animal feed scare shuts German farms

Thursday, January 13, 2011

Extreme pen makeover, Piglet edition

In the tradition of makeover shows, today's opens with a really big truck of bone-dry wood shavings.  these are generated by a local sawmill cutting timber into lumber, and they smell great.   The huge chip truck (56 yards of chips) rolls up, and the tarp comes off, and then the whole thing is deposited there. 
In a small greenhouse that will have its plastic replaced this spring, 20" of wood chips goes down.  I use a very thick layer to provide plenty of absorbency, and to keep the piglets I'll keep here dry and warm.  I have a real challenge keeping the little guys warm enough -- we don't get cold enough to freeze, and we get rain all the time, and the combination keeps the pigs wet enough as they go in and out of shelters that the bedding gets damp.  That's not all bad though -- it composts and generates heat, but I like to give the littlest pigs their choice of bed -- dry and fluffy or warm and moist.    This is something similar to what Matron of husbandry does with her cows.
This particular hoophouse was used last year to raise tomatoes and peppers, and then to house turkeys during their laying season, and has been being used by the sheep occasionally.  The plastic is all tattered at sheep height -- which is fine.  the main thing I want is to keep a good roof over the dry bedding I'm laying down.  To bed the whole greenhouse took about 15 yards of shavings.
Underneath the shavings is a mix of turkey manure, older chips and chicken manure.  In the late spring I'll be replacing the plastic on this hoophouse and using it to grow melons this year, directly into this soil.  I had good luck with watermelons, and I'd like to branch out and try some muskmelons and other stuff that I like to eat.  And a few more tomatoes, of course. 

I use the hoophouses because it never really gets hot enough in the summer to ripen tomatoes.  I have lots of green ones, but unless I give them a little heat boost I never get the luscious, red, ripe tomatoes that I really crave. 

Wednesday, January 12, 2011

Foreclosure, part III - they gotta go, sorry.

I purchased a townhouse at the 2010 tax foreclosure auction, and I've written about the purchase and my initial visit here, and a few weeks later I wrote another blog entry about it here.

I've been wrestling with whether to rent the unit to the previous owner or not.  I worked out an agreement that allowed them to stay through the holidays for no rent, and today was the day I needed to make a decision. 

I've decided not to rent the townhouse to them.  The primary reason is that I'm fundamentally uneasy extending credit to someone who's willing to walk away from their obligations.  There really isn't any reason to go into more detail there, that's the basic conclusion I came to. 

If I'd had this couple come and fill out an application, and the credit report came back with a foreclosure, that would pretty much be it when considering them for tenants -- there are plenty of good tenants that don't have that sort of black mark on their records. 

Yea, it's not an easy path, but I'm betting that there's a good chance of future problems, and might as well deal with it now than put it off any longer.  

Tuesday, January 11, 2011

Cogitating while doing daily chores

From time to time I feed bread to my pigs (Thanks Patrick!).   Sometimes its packaged, sometimes its just the loaves.  Today it was packaged in all of its retail glory. 
Each package extols the virtue of that particular loaf, and talks about the health benefits of this bread.  I am a health god today, throwing loaves of great health to my pigs.  In fact, according to the packages, they'll get virtually every health benefit known to man!
This loaf is even named HEALTH NUT -- you can't get any better than that.  I'll have to read the package closer to see exactly the sorts of good it does me, but it makes me feel good just to handle this plastic bag and have it affirm that I'm feeding my pigs the best stuff on earth!
Hearty grains!  that just sounds good!  It must be amazing stuff.  [slash open bag, shake out bread, toss bag into garbage can]
Yummy.  I like honey wheat!  [slash open bag, shake out bread, throw bag into garbage can...  repeat 200x]
These pigs are so astonished by the health benefits of this bagel that they're rooted in place!    Each of them wants to give the others the healthy benefit of this particular morsel.  Or they're so full of bread that they can't eat any more.  I can't decide. 

Sunday, January 9, 2011

English pork pie


This is my attempt at an english pork pie.  I've got some smoked picnics that are left over, and I'm looking for a tasty recipe for them.   So instead of the pork shoulder called for I used a smoked shoulder.  The crust and seasonings are per the recipe on the website.  I'm lucky to have a scale that measures in both metric and imperial measure.     
This is what the pie looked like.  I don't have a deep pie dish, so I used a stainless rectangular pot that I'd bought at an auction a while ago.  it worked out, but to be pretty I'd have preferred the crust to be taller than the dish. 

I'm not going to post a recipe here because I'd like to try making it a few more times, perhaps find a proper pie tin.  But I thought I'd share with you guys what I'm eating tonight. 


Friday, January 7, 2011

forms off

Concrete forms came off today, revealing the new walls.  they're about 8' tall, from slab to top of wall.  For both flood water access and to allow light in I put windows into the south wall, and there are large openings on either end. 
The forming for the windows was pretty straightforward; diagonally braced and constructed 2x10s cut down to 8" width.  Unlike modern lumber, an 8"concrete wall is truly 8" thick; so to make a board that's the right size, you use a 2x10 and cut it to exactly 8" in width for the forms.  On the other side of the forms you can see the form boards used for the concrete. 
Here's the same area, but with the form boards, on the day of the pour.  You can't see the openings, but they're there. 
We also put in a couple of smaller openings, mostly for fun.  Here is a 24" square opening. 
...and here's a man door sized opening.


Huge relief to get this part of this project done.  Carpentry, next!

Thursday, January 6, 2011

Concrete pour complete

 Started pouring the concrete at 8am this morning.  A pump truck makes this whole process easier; delivering the concrete to precisely where you need it.  In this case into the top of the forms for the wall, and to a slab behind the barn. 
 The first step is to get the bulk of the concrete into the form; here my brother Bryan is directly the hose and filling the form.   He's standing on a scaffolding we constructed along the inside of the form to allow us to get to the wall easily; both for filling and for later work. 
 Here WB and Virgil are using the stinger to remove air pockets and compact the concrete in the form. 
 Out back is a slab on grade.  I desperately need some place to work on equipment like tractors, that doesn't involve me laying on my back in the freezing mud.  Very  happy to have this slab go in.  For reinforcing mesh for this slab we used an old roll of fencing that I found on a property I purchased recently.  It was galvanized 48" no-climb fencing, but had been sitting out and run over by equipment and was in pretty poor shape.  But for reinforcing mesh it worked great. 
 View from the inside of the barn.  the floor in the foreground was poured a few weeks ago and is the slab that contains the radiant heat tubing.  Out under the blue tarp is the new slab, and it's surrounded on all sides by the new walls we poured today. 
On the top of the walls are the brackets for the 6x8 beams that will hold up the roof, and bolts that are inset into the concrete to bolt the wood to the concrete foundation.  The bolts are primarily a seismic issue.  We do have earthquakes here from time to time, and having the building bolted to the foundation means that it won't slip off in the event of a major earthquake.   It's overkill for a barn, but I'm building to last, and the bolts add around $80 to the total cost of the building, so they're well worth it.