Tuesday, November 30, 2010

4th Generation dairy farm auctioned today


I was reading the local paper on Monday, and saw this story:  Fourth-generation dairy farm in county to sell off cattle, equipment.   This particular farm had a manure lagoon burst earlier this year, and I mention that because it's a significant cause of this farms demise.  Not the burst lagoon so much, as the uncertainty that they'd be allowed to rebuild it. 
The local news media was out in force; camera crews from the three local TV stations, print reporters from the local papers, and a couple of bloggers like myself.  I was there to buy equipment that I use on my farm, calf domes and maybe tractor.   70 year old dairy farm gone in a flash

The prices received for the cows were generally higher than you would see at a typical auction.  Part of this was because Bartelheimer Brothers dairy  had a very good reputation for their animal husbandry, and had been in business for 70 years.  Unlike the auction where you're getting the animals that the farmer wanted to sell, all of the animals were for sale here.  The silver, gold and platinum -- every animal was for sale. And the bidders recognized that and paid a 15-20% premium over equivalent auction prices.  It's rare that you get to see appreciation in concrete form; and for farmers, where every dollar is dear, the tribute was nice. 

excerpts of conversations:
"...yes, my girl goes to school with one of the grandkids.  I saw her over there crying, I didn't know what I could say..."

  "...what's he going to do with the land?  there's 500 acres here; can anyone else make a profit if they buy it or lease it?  it'd be worth a couple of million and the interest on that sort of..."
The

"...yea, it was the manure lagoon.  To rebuild it they'd have to spend a lot of money on seismic tests and there's no guarantee that they'd get the permit even if they did that, and milk prices..." 

"Hi Bob!  buying today?"
Most of the people standing in the rain were in their work clothes, boots and hats, and most of them knew each other.  You'd see small groups form up, as each weighed the value of this or that item sold, or whether it was a good deal, or commiserated with a glance around that the last two years were tough.  "...yea, the market for cheese and export just dried up, and..."
the hundreds of people followed the auctioneer around, as each item was sold.  There was no overt expressions of joy; most of the buyers knew this family directly, but reputation or in person, and a "bargain" wasn't really something to crow about.  But farmers are a taciturn bunch even in the best of circumstance; I think that it's the stoic nature of America farmers that make protests about food prices as are common in Europe something that would be hard to imagine here.  I'm reminded a bit of a lyric from an offspring song, "self esteem".  "The more you suffer, the more you show you really care, yea, yea yea!"

After the bidding was done as people settled their bills, small groups socialized.  Sometimes this sort of event is the only time that these guys see their peers.  So much of their work is done surrounded by acres of space and hundreds of animals. 

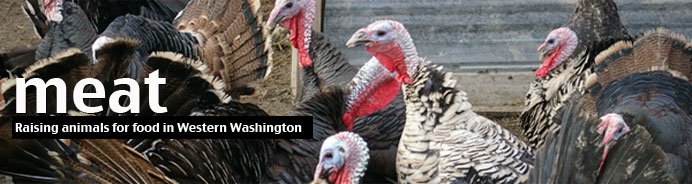
Western Washington drinks a lot of milk and eats a lot of ice cream.  When we have a regulatory environment where a long-standing business with a good reputation and decades of experience can't be certain to be allowed to continue, it's a pretty significant problem.   Sure; I'm not a big fan of manure lagoons, but that's the current method of dealing with the manure -- and what this means is that the same production will just be shifted to some other area -- probably some other state.  Local food means that we should be prepared to see it produced, and deal with the consequences of that production.  Our current environmental stance is hypocritical.  The same stuff goes on in Wisconsin and Iowa and Indiana and Ohio; and milk and products shipped in from there are purchased without batting an eye.  I believe that we need to be more honest with ourselves.   Next time  you eat ice cream, or butter, or milk, or bake a cake or do any of the other myriad things we do with dairy products, think about this.  I count this farm as killed by NIMBY. 

What to do

For farmers or people thinking about starting a farm
  If you're a farmer or considering becoming a farmer, consider joining your local farm bureau;  yes, they are reasonably radical, but they will also keep you aware of the issues facing agriculture in your area and in the nation.    This particular farm had no direct-to-customer retail that I could see, and I haven't seen many profitable farms that don't have at least some direct-to-consumer sales.  Strongly consider selling at least half of your production direct to consumers as a basic goal in your business plan.  Wholesale means you'll get what the average farmer gets; $0.05 per retail dollar for farm goods, and that just sucks. 

For consumers who want to help keep their food local
If you're a consumer, consider directing 10% of your food dollars to a farmer you know the name of.  If you know their name you're buying direct, and that means that more of your food purchase dollars are going direct to the people who produce it, and that helps them stay in business and local, too.  One site I recommend is eatwild .  I like eatwild because it will put you in touch with farmers that maybe haven't made the marketing leap to get into a farmers market, or a direct-sale website, and those are the folks that are usually closest to the edge -- they appreciate your business all that much more.

Saturday, November 27, 2010

Haggling

I was talking to a farmer I know the other day, and he mentioned a conversation he'd had with a fellow who raises turkeys.   This turkey farmer said that he'd sold around 1,000 turkey poults this year, and was proud of having only lost $300. 

  Paul, my farmer friend, pointed out that if he'd charged just a dollar more per poult that he would have made $700.  That's one of the reasons I like Paul, my farmer friend.  He's sharp, and focused on the most sustainable element of small farms -- staying in business.  A dollar a bird is the difference between making a small profit and subsidizing other folks dinners.  

In my farming, I deal with quite a few immigrants, and most of them come from cultures where haggling is the norm.  In fact, if you pay the asking price in their culture, you're almost guaranteed to be disrespected.  In fact, in those countries, they'll always have an asking price that is higher than the merchant would expect you to pay, just to have room to haggle.  They might quote you 32,000 baht, but they're willing to sell it to you (with appropriate amounts of theatre on both sides) for 8,000. 

So I regularly deal with customers who feel like (from their base culture) if they pay my asking price that they're being ripped off.  Even if they intellectually know that they're not, emotionally they feel like they're not getting the best deal that they can. 

What to do. 

I've finally started quoting two prices to people.  If I think that they're from a haggling culture, I'll usually quote 30% higher to them, and watch them flinch, and then haggle down to the price that I'll quote to a non-haggling cultural member in the first place.   At times the person will agree to pay the haggling price outright, and I'll make up some excuse to bring it down to the regular price -- which is calculated to contain an appropriate amount of profit anyway.  I'll say something like "if you'll buy two, I'll give you them at xxx", or "if you'll buy a second one from me later,  I'll sell it to you for yyyy".   Depends on the customer.  If they've taken quite a bit of time, or it's a complicated sale, or on short notice (I MUST HAVE 2 CHICKENS TODAY!!!) I figure that the extra margin is just a "rush fee". 

Friday, November 26, 2010

Small scale farming in Canada

thefarmersstand, a blog written by Barbara Johnstone Grimmer, has a couple of entries that I thought were interesting.  They're videos, interviews, of farmers and customers talking about the plight of small farmers in Canada.  It's interesting to note that the Canadian farmers have the same sorts of complaints as the small US farmers.  
  1) Slaughter regulations prevent sales to interested customers
  2) Slaughter regulations are driving small slaughterhouses out of business
  3) Small farmers, given this situation, are closing their doors.  

You'll find part 1 here, and part 2 here

I appreciate the insight into farming in another regulatory environment; thanks to Barbara for posting this. 

Thursday, November 25, 2010

Ok. How lazy have we become

For $8.50 a pound you can get organically raised carefully smoked wonderful bacon. Or this.


for $1.61 (which is what a pound of this costs) you can buy 16lbs of potatoes.  yea, you gotta boil them.


Drinking water

The tough part of cold weather isn't feed or shelter -- it's water. 
I'm a big fan of automatic waterers, but they don't work very well in the cold weather.  So my fallback is the old-fashioned trough.  there's enough water in them that they don't freeze solid overnight, but I do have to go break the ice and toss the chunks out every day. 

If the cold snap is long enough ice builds up from the sides, which is much harder to chip out.   A little bit of salt overnight melts it; I'll toss a couple of cups into it at dark, and then at dawn dump the trough and refill it.   I use these low troughs for the pigs, and find that they turkeys utilize them, too. 

This is the chore I hate the most. 

Wednesday, November 24, 2010

Turkey processing, 2010

The new barn space is shaping up well.  Pictured is the stainless steel countertop I bought at auction for $200; it is 13' long and has a bend and a built-in sink.  You can add another straight counter to it to go around a corner.   Having 3 yards of stainless countertop made the whole process simpler.  You can see the hose with an attached nozzle on the right in the photo.  Behind me and to my right are the kill cones, scalder and plucker, arranged basically in a U shape. 

Thanks for another successful thanksgiving, folks.  I appreciate your business and hope you enjoy your birds. 

Other thanksgiving traditions - Tongan

I've got a number of customers from the local Tongan (as in from the nation of Tonga) community, and for their thanksgiving - in fact, for most social gatherings (weddings, funerals, family reunions, etc) their food of choice is a nice small pig. 
They like their small pig fresh -- as fresh as they can get it, which in this case means that they'll be cooking it less than an hour after slaughter.  Here two long time customers of mine and their two sons are scraping a pig that they purchased from me.  This pig will be the centerpiece of a family gathering of 10, and after they've all eaten their fill each person will go home with a packet of food for consumption in the next few days. 

I like these guys.  Most of the guys I know are involved in heavy construction of some sort; steel or concrete.  Hard working guys who work equally hard to provide the cultural experience to their children, too. 

(notice the killing road-cones in the background; we processed the turkeys here.  We're putting the barn slab to use already! 

Monday, November 22, 2010

"free range organic layer house".

here's a nice writeup with some pictures of an operation that is certified as an organic, free-range egg producer. Take a look at it and tell me what you think.   You'll find that link here. 


Update:  The page that I referred to with a writeup of an organic layer house, was removed by the author.    I've removed the link here in respect,, but I'll relate my opinion of what the writeup said: 

the pictures were of a layer house; a few  hundred feet long, crammed with birds.  Nothing unusual there; the difference was that this was a "free range organic layer house" -- certified so. 

the barns had 2" of bedding, and on top of that was 4" of chicken manure.  the ammonia smell was quite strong -- the ventilation was turned off because it was cold outside, to keep the buildings warmer.  The ammonia was enough to make the authors eyes water. 

In the walls of this building were cut openings, and each opening was covered with a piece of plastic.  That was done to satisfy the "daylight" requirements of the certifications.  I can't say how many of these holes were cut, but I think that one every 20 or 30 feet would be what I recall from the pictures.   The openings were about 2' square.

Into one side wall of the building were cut small doors, about 12" square.  These were to provide "outside access and access to vegetation", but the author related that no sign could be seen of any chickens actually using these doors.  If your flock and food are inside the safe building, why venture out? 

And finally the author noted that the organic free-range certification allowed the confinement of the birds for "health" and other reasons, but noted that these birds had either never gotten out at all, or had done so in a way that left no trace of their presence outside.

Opinion:     Chickens devour grass; and for that number of chickens in a fixed building, if they were really going outside, I'd expect to see bare dirt.  there was a planted lawn that didn't appear to be disturbed in the pictures. 

The author related that this was a barn that they were allowed to see, and that there were signs of cleanup.  The implication being that the other "free range organic layer" buildings were worse. 

I'm sorry he took the post down.  Transparency is important, and if a certification organization is certifying stuff that they're embarrassed about, shame on them!

Brrr! cold!

Temperatures in the teens and 20s, and wind gusts up to 40 mph.  Very cold conditions.  The pigs aren't doing what I expected them to do. 
They've chosen to dig themselves into the top of the compost pile.  Under the surface it's pretty warm, but they're ignoring the shelters completely.  The big pigs are.  The smaller pigs are piled into the shelters.  Everyone is eating quite a bit to keep warm. 

Extra hay for the piglets and feeder pigs.  Extra hay for the nursing moms.  Alfalfa and regular hay for the cows.  Puppies get a fresh bedding and a hay bale to close off the entrance to the whelping pen -- cut down on drafts. 
It's cold. 

Sunday, November 21, 2010

The origin of the term "pigpile"

We're experiencing a bit of colder weather; when it gets colder, the pigs do this.  They stack themselves like cordwood -- bigger ones on the bottom, medium sized ones in the middle, and little guys surfing at the top.  These group is all facing the door of the shelter, but sometimes they'll arrange themselves so that they're alternating forward and back. 

I'm always concerned about keeping the pigs bedded properly.  With the amount of rain we get, and the clay-based soil, the drainage isn't very good, and that means mud.  lots of mud.  Even in sacrifice paddocks.

My solution is to keep adding more and more dry wood chips to their shelters... well, that's not really what I do.  I put two tractor scoops of fresh chips down next to their shelter, and them move their shelter on top of the new chips.  It's easier than having to shovel the chips into their shelter, and the pigs enjoy the new chips.  they'll go into the pile and bury themselves in it.  When the chips get damp, they will usually start to compost, and the pigs body heat helps that, and that provides a nice, warm layer underneath the pigs.  When it gets too wet I'll repeat. 

Thursday, November 18, 2010

Pouring the slab

Poured the concrete slab today.  Notice in this first picture that the tubing is arranged in smaller loops with a space between them.  that's for different zones, and to allow the concrete expansion joints to go in without having a tube cross it.  An expansion joint is a pre-planned crack, that allows the slab to expand and contract.  Having a small joint there keeps the rest of the slab crack-free. 

Notice the orange line in the picture above- that's the target concrete level.  After the concrete is poured in, it's screed.  This is done by drawing a straight edge along the top of the concrete to cut off the humps and fill in the hollows.  it gives you a roughly level surface.  In the picture below, they're using the painted line on the sidewall to guide their scree.   

 Once screed, the concrete looks level in this picture, but there's still some ridges and hollows.  The next step is to go around the edge and hand-trowel the 12" in on all sides.  the picture below is the screed concrete. 
 The next step is to bull float the concrete.  This tool pushes the rocks down into the concrete and makes for a smoother surface.  you'll notice that it's a little shiny; the "cream" comes up out of the concrete, and this is what will eventually form the shiny finish on this floor.  I prefer a smooth, shiny finish for surfaces that I'll be pressure washing.  A rougher surface allows better traction, but also means that stuff sticks to it better and it's harder to clean. 
 In the picture below you can see the difference between bull-floated and screed surface.  The top right is the screed, the area to the left of the bull float is floated.
 Now we've bull-floated the entire surface and it's roughly level -- level enough for a barn.  We poured at 8am, and we were here at about 10:30-11.  Now we wait an hour or two for the concrete to firm up a little.  The plant added a lot of water to the mix, and that makes it easier to get out of the truck, but it takes longer to get to the consistency you need to use a power trowel. 
 The power trowel is how you get the smooth, shiny surface with the least amount of effort.  This tool has 4 blades that rest flat on the concrete and weighs about 300lbs.  You use it like you would a floor polisher, and in effect that's what it is.  If there are any dips or rises, this tool will help to smooth them out.  It will also push the rocks a little deeper, and bring up more cream. 
 Probably 2 hours of power trowel, and then some hand work, and then we enclosed the whole slab in plastic and installed a small propane heater to keep the air warm.  It'll be cool tonight and we don't want the concrete to freeze.  Concrete does generate some heat as it cures, but the propane heat means and we don't  take any chances. 
Slab is in, smooth. level, and warm.  A good day.

Tuesday, November 16, 2010

Pressure testing the radiant floor plumbing and discussion of pex tubing

When you work with this sort of tubing, the tools they make are very expensive.  With the expensive tools you can use the cheaper fittings  - a crimp coupling is about $1.  The tool to crimp is around a hundred dollars.  You can circumvent that by buying fittings that don't require crimping but each fitting, like the couplers pictured below -- are $6-9.  So the math is pretty simple:  if you're going to do just one radiant floor and don't plan on doing it ever again, just buy the more expensive fittings.  If you're going to do it in the future, invest in the tools.  I don't do this often enough to make purchasing the tools worthwhile. 

The other issue with radiant floor systems that isn't obvious is that there are two grades of tubing.  The least expensive tubing is what is used for water supply lines in mobile homes and other construction.  It's simply a plastic tube.  For burying in a slab they make a more-expensive tubing that has an additional coating on the outside of the tube.  The oxygen barrier pex tubing is usually 30-50% more expensive.

Here's a quote "The oxygen barrier, ethylene vinyl alcohol (EVOH), is applied to the PEX tubing during the extrusion process.  Typically used in hydronic radiant heating piping systems, the additional oxygen barrier layer is added to limit the amount of oxygen that can permeate into the system through the tubing, thus preventing rust from forming on any ferrous metal parts.  "

What this means is that if your heating system has metal parts in it that can rust the oxygen barrier tubing will retard that rust.  Functionally it's the same as the untreated stuff.  In this application I used the untreated tubing.   In this installation no metal parts are buried in the slab.   So if I do have a metal fitting that fails at some point in the future, I can cut it off and replace it in a few minutes.   If I were doing a system where I was burying metal couplings and stuff in the slab itself, I'd be inclined to use the treated tubing.   By using this cheaper tubing I've probably saved $300 between the higher tubing and tool cost. 

After installing the tubing and zip-tying it to the reinforcing mesh, it's important to test it.  It's pretty simple.  I've got two lengths of tubing here; so I install coupling and cap one end to make it a single tube. 
 On the other end I install a pressure gauge.  It's designed to allow you to pressurize the tubing, and after that you can look at the gauge to determine if there's any leaks.  I pressurized the tubing to 25lbs and left it overnight to make sure that everything was intact and good for the concrete pour. 
Left overnight, no loss of pressure.  We're good for the pour. 

Source of quote related to oxygen barrier pex tubing: 

Monday, November 15, 2010

Eating roadkill

I had a medium size pig get out of the fence earlier today; a nice 60lb berkshire barrow.  I spotted the pig out, and went out to the road to herd it back in.  While I was doing that a helpful neighbor driving by stopped a little farther down the road to block the pig from running, and I walked up, intent on circling around it to then encourage it back into the gate. 

I noticed a car down the road, making a good speed, coming up.  I tried to get this pig off the road, and apparently my standing in the road waving my arms distracted the driver and they responding by SPEEDING UP and basically ran down this pig.  Big thump, pig on the ground behind the car.  the driver heard the thump -- you could see the car flinch, but kept going, down the road to the stopsign.  Where they stopped and looked back, and then DROVE OFF. 

It was pretty dark.  The pig was black.... but the truth is that I don't think they know what they hit, and that they didn't want to know.  i'm guessing it's someone on the island, and I'll keep my eye out for a late 90s ford explorer.  But if you're reading this, here's what I'm going to say: 

  IF YOU SEE CARS AND PEOPLE IN THE ROAD SLOW DOWN
  IF YOU HIT SOMETHING, STOP AND SEE WHAT IT WAS

So i'm watching this car drive away, and I'm looking at my dead pig, and honestly the first thought that crossed my mind after the outrage was "darn.  I'm pretty bushed already.  I didn't really want to scald and scrape a pig right now". 

The car seems to have hit the pig on the right front shoulder, right at the spine, and to have broken the spine.  the pig was down pretty quick, kicked a couple of times and was done.  When I opened it up all of the ribs on the right side, under the shoulder, were broken right at the spine.  It looked like a rib fragment cut the arteries at the top of the heart; lots of congealed blood in the body cavity. 

After scalding and scraping, I split the pig in half and then slow-roasted the half a pig shown above; 275 degrees for 12 hours.  I'll can some of it, because I'm short on freezer space right now, and freeze a little of it, and eat some of it fresh; pulled pork BBQ sandwiches, carnitoes, that sort of thing. 

Sunday, November 14, 2010

Barn construction: Complicated slab, solar radiant floor heat

Last week or so I've been working on the completion of my little barn.  I like working with concrete as a material -- pourable stone, what's not to like? -- but this particular little slab has been pretty complicated. 

This is the same basic construction stuff that you'd do for a house foundation; I'm doing it because I'm building on a flood plain, and would rather not have my little building float away.  By using a poured foundation and footing its well secured.  The barn itself is a 20x20, that small size chosen because no building permit is required for a structure of that sort.  Although given the other permit hassles I've had, the next time I think I'll just build a big barn.  Meanwhile, I'll finish this barn out as a proof of concept for a couple of ideas.
 The picture above is a cut-away view of a a typical foundation.  The green circle is a drain tile (a pipe laid along the edge of a foundation to allow water to drain).  The horizontal part that the pipe is laying on is the footing, and the vertical part is the knee wall.  Concrete, as materials go, is relatively expensive.  Your knee walls are usually as short as you can make them -- it's cheaper to build a wall with wood -- but in this case I'm choosing to make the knee walls relatively high; part of that is that having someone else do concrete for you is expensive -- but the costs go way down if you can do it yourself.  The slab is inside the knee wall, on top of a bed of gravel. 
I prefer to lay slabs on gravel beds because gravel is cheaper than concrete.  let's rephrase that; to get a slab to a particular level, you can either bring the ground up or bring the slab up -- pour more expensive concrete, make a thicker slab.  In this case, $150 worth of gravel saves $500 worth of concrete.  I work the gravel with an 8' 2x6 and a rake, smoothing it as I go.  I moved the gravel into the building and spread it with my tractor. 
The next step is to lay down plastic -- I'm concerned about water under this slab.  The plastic keeps the concrete from penetrating the gravel, and allows the gravel to act as a drain, allowing the water to move under the slab.  If the ground was relatively dry you can skip this step, but for the $30 that a sheet of plastic costs, I do this under every slab as extra protection. 
One of the ideas I'm working with is a radiant heating system in the floor.  To do this you need to make sure that the slab of concrete that is your floor is thermally isolated from the ground.  So on top of the ground there's a layer of gravel, then 2" foam insulation boards, then 6x6 concrete reinforcing mesh and on top of that is the tubing will be used to heat the slab. 
The reinforcing mesh will make the slab resist cracking and settling, and is just what you need to tie the pipe in.  Here I'm using zip-ties.  they won't damage the tube in the future. 

The reason I'm choosing to do this is that this area will be a working area,  and will contain pig equipment and gear, as well as water supplies for pigs housed here. 

So here's the basic theory on radiant floors:  The concrete slab will be heated by liquid run through the tube; this heat will radiate up from the slab, providing an even, pleasant heat without hotspots, or the need for radiators or other ductwork.  Since I'll be using this space as a barn, and scraping it out with a tractor, having a smooth, impervious floor and clear space is a big plus.  Now I don't have to use the heating ability of the floor at all -- if I choose not to, I've spent $200 or so in vain.  But short of ripping it up and messing with it,  when you pour the slab is when you do this, so I'm putting it in now to keep my options open in the future. 

For a low-temperature barn -- say 50 to 60 degrees -- you can use a small water heater, a pump, and a low-temperature thermostat to keep your building comfortable.  The water heater is on at all times; when the thermostat detects low temperatures, it starts the pump, which continues until a pre-set temperature is reached.  the water heather, pump and floor are on a closed system, which if I do this will be filled with a non-toxic mix of water and antifreeze.  (I don't want to have to worry about the liquid freezing in the heating system, and I don't want to have issues with animals drinking toxic antifreeze.  ) 

A second option is to mount a solar collector on the roof.  Have a pump switch on when the water in the collector hits 100 degrees (which you can get to even on a cloudy day).  While the pump is running it's circulating the water water through the slab, transferring solar heat into the mass of the slab.  After dark the pump switches off and the slab then releases its heat gathered during the day overnight.  The next morning the process repeats. 

This is basically the same thing that a heat pump does, but I can't bring myself to pay thousands for a heat pump.  A little 12 volt pump, a few solar cells, a couple of temperature sensors and some copper pipe and lumber makes a perfectly workable system that costs a few cents a day to operate. 

What's all this cost?  The insulation is actually the most expensive; it's $15 per 4x8 sheet of 2" material.  it's R7 or so, which works for my purposes.  the reinforcing mesh and gravel I would have done with any slab.  The tubing is $0.60/foot, and to do a 20x20 with tubing at 8-9" centers took about 320' of tubing and a coupling.  You'll want a pressure gauge and cap to test your system to make sure its airtight before you pour; that costs about $20. 

Total cost to put in radiant floor heat option:  about $1.20/square foot. 

For a discussion of pressure testing the floor plumbing and a discussion of the types of tubing used, check here

Wednesday, November 10, 2010

Horses -- the other red meat

What does horse taste like? 

That's a question that you, as an American Citizen, probably can't answer.  We just don't eat them.  They're edible, and other countries do, but we don't. 

Our feelings about horses are that they are a special animal; many people consider eating a horse with the same sort of horror that they'd approach eating a beagle or a black lab.  This sentiment is so strong, in fact, that horse meat was prohibited from being used in pet food in the united states in the 1970s.  Horse meat for human consumption was effectively outlawed in the United States by legislation that closed federally-inspected horse slaughterhouses in 2007. 

When we outlawed slaughter for horses in the USA we shifted some of the market to Canada, and some to Mexico, and for many horses, instead of being slaughtered in a regional plant that means a trip of many hundreds or a thousand miles before they're slaughtered, often in cattle trailers that aren't tall enough for the horse to stand upright -- an uncomfortable journey, and certainly the last thing that the folks who outlawed the USA slaughter of horses had in mind. 

What faces many horse owners now is that there is just no good way to dispose of a  horse that is lame, dangerous to ride, or that the owner simply cannot afford to keep any more.   In my area there are several well-publicized cases of horses being slowly starved to death (there are horse animal hoarders) or abandoned.   You take your own horse to a trail, go riding, and find your trailer filled with horses on your return. 

Yes, there are horse rescue groups, but there's just too many horses for them to take.  Would you rather see the horse humanely killed in a USDA inspected slaughterhouse or trucked to Mexico and killed under...  well, brutal would be the word that I'd use -- conditions?  I'm speaking as someone who regularly slaughters
I've been to several auctions in the past 3 months where horses have sold for between $1 and $10 each -- 800 to 1,000lb animals. 

For a variety of reasons I'd like to see horse slaughter return to the USA:  Shorter journey for the horse, local jobs and economy, kindness, and ability to regulate and enforce those regulations to ensure humane handling of the animals. 

And I hate to see the horses wasted.  At current auction prices, many people just shoot and bury their horses directly.  When you can't even get enough for the horse to pay for a happy meal, there's just no incentive to do the right thing when disposing of it.  I'd much rather see that horse go as human food. 

Current article in the Seattle times talking about saving a "horse with a name"
wikipedia article on horse slaughter. 
abandoned horses in Time Magazine
horses being abandoned at boarding stables - the legal view
Rising abandonment rates - USA today
A million horses - lobbying for horse slaughter

Mexican slaughterhouse video.  Gruesome stuff.  You really think this is better than a USDA plant?  These guys want to outlaw export of the horses for slaughter entirely -- leaving horse owners with even less option than they have today. 
Canadian Horse slaughter.  Not quite so gruesome.  They talk about the difficulty in using a captive bolt on a horse -- but compared to Mexico slaughter...

Sunday, November 7, 2010

Meatballs & Convenience

Sometimes you want an easy meal
Ground lamb

My first job was in a restaurant, where I eventually become a prep cook, and I actually use that experience more than I do my calculus, hard won in high school and college. 

Working as a commercial cook taught me a number of things; most of all that it doesn't take much more time to make a big batch of something than a small batch, and I apply this to my food.  By taking 10 more minutes and making a batch 6x as big as normal I can then make the main ingredient for 8 to 10 dinners in the future.  Efficient.   

This post is about making meatballs, and, and then different meal ideas you can use these meatballs in.  you'll find the recipe at the bottom of this post.   I make a big batch like this because once the meatballs are cooked and ready, dinner is only 15 minutes away. Pop them in the microwave and serve. 

Berkshire shoulder roast, sliced. 
I chose the shoulder roast because it has about the perfect fat content, roughly 30%, to offset the very lean grass fed beef and grass fed lamb. 
The first of the pork on top of the lamb
You can see the color difference.  Before I grind the meat I freeze it, or at least get it slushy.  easier to handle, easier to cube, and I want to keep the fat solid, not liquefied.  Start with the meat cold, keep it cold during the process. 
Chilling the coarse-ground meat
After coarse grinding the 3 meats; lamb, beef chuck and pork shoulder roast, mix in the dry flavorings and egg, and then put it into the freezer for 20 minutes, to keep it well-chilled. 
Course grind meat with dry ingredients added and mixed

After it's chilled, I run it through the grinder a second time.  A second grind completely incorporates the ingredients.  I don't add the spinach before grinding because it turns into a liquid.  I want to see the large green bits in the finished product. 

Fine grind
Once ground, I mix in the spinach and form into meatballs.  My restaurant training has me making them 1.5 ounces each.  You can either freeze them raw, as shown, or bake them for 20 minutes in a 400 degree oven and then freeze them. 
Raw meatballs, arranged to freeze individually

Raw meatballs, cooked before freezing
Recipe: 
  3lbs lamb (leg, shoulder, stew meat, whatever)
  3lbs pork shoulder roast
  3lbs ground chuck
  2lbs fresh spinach
  3 cups Parmesan cheese
  6 eggs
  3 tablespoons dried basil
  3 tablespoons dried parsley
  1 tablespoon minced garlic
  1 tablespoon salt
  3 cups bread crumbs

  Course grind all the meats.
  reserve half the bread crumbs, add half to the meat
  Add all other ingredients and mix
  Fine grind the mixture
  Chop spinach and mix into mixture

 Form into 1.5oz meatballs, and then coat with bread crumbs.
 Bake at 400 for 20 minutes or until internal temperature reaches 160 degrees
 Remove, allow to cool, and then eat or package for freezing.

 Serving suggestions: 
  Meatballs for spaghetti
  Coated with mushroom soup mix for a main course for dinner
  With a marinara sauce, excellent meatball sandwiches
   Raw as kabobs with vegetable chunks between
  Sliced with feta, yogurt and flat bread as gyros

Friday, November 5, 2010

New tractor

I've been looking for a smaller, lighter tractor for my farm, and ran across this one on craigslist. The basic features I looked for were 4 wheel drive, hydrostatic transmission with shuttle, a front loader and if I could find one, a backhoe.  This particular tractor had all of that.  1700 hours on the engine is a bit higher than I'd like, but it looked like it had been well maintained, pins in good shape and no welding on it, so... 
It's a New Holland TC33, weighs 2500lbs (without the backhoe) and is 33hp.  It's a 2000, cost me $9800 off craigslist.  Included was a 3pt auger, 5' brush hog and a 5' rock rake and a 5' box blade.  Good, light tractor and I've found it every useful. 

ok.  I confess.  I love machinery and I needed an excuse to own another tractor. 

 The backhoe is a bradco 3375, and it's mounted to the tractor on a 4 point frame mount.  It uses the hydraulic system of the tractor and it works pretty well.  You can remove it and use the tractors 3pt hookup for other stuff, like mowers and augers and stuff. 
I needed a smaller tractor to be able to move across softer ground -- river bottom land gets soggy - and I wanted something that could get into barns and stalls and other tight spaces to make the daily chore grind faster and easier.  Pretty happy with this tractor so far.  

Thursday, November 4, 2010

Pink, perfect Piglets

 Piglets are pretty fun to watch.  I turned this litter out into my vegetable garden.  They're busily rooting out the turnips that I planted for them in the spring.  Occasionally they find something better; an acorn squash is a challenge, but worth trying for.  A missed carrot.  Some lettuce or cabbage leaves. 
 They are very fast, and very alert, and roam around in a big group, sort of like a blob of oil on water. 
 A pigs nose is one of their most sensitive organs.  Their nose is constantly working; they'll often detect some thing first by smelling it, and then look at it. 
 what's interesting about a herd of piglets is that they seem to always have one or two looking out for the herd.  So here I've got two looking at me, while the rest ingore me.  They'll sometimes startle; a deep, gutteral UMP! is the warning bark, and they'll all bunch up and run a short distance, looking back. 


Piglets in the fall.